
Update Chipset Drivers in Windows OS Device fixes several bugs associated with your motherboard’s chipset and enhances overall performance of computer. If you are unaware, Chipset Drivers are essential software act as mediator between various components of System (Including processor, video card, hard drives, PCI devices and System memory) and Operating System installed in your computer.
Depending on motherboard and Operating System version installed, you need to download and install latest Chipset drivers in your computer if chipset drivers are missing update or are outdated/corrupted. For example, if you have Intel-brand motherboard chipsets integrated on your computer, then Intel Motherboard Chipset drivers must be installed in your computer.
Without Motherboard chipset drivers, you might face several System performance related issues like Windows installs automatically outdated drivers, Windows installs multiple drivers for the same hardware device, or similar issues. If you don’t know your motherboard model and serial number, then it will be difficult to install correct chipset drivers in your machine. Let’s take a look at steps to find these and after that, you can Update Chipset Drivers using our instructions.
How to find PC Motherboard Model and serial number?
You need to be aware of manufacturer and type of motherboard to check its supported components. To check PC motherboard model and serial number, follow the steps below.
Method 1: Find PC motherboard model and serial number using ‘Command Prompt’
Step 1: Press ‘Windows + X’ keys together from keyboard and select ‘Command Prompt as Admin’
Step 2: Type ‘wmic baseboard get product,manufacturer,version,serialnumber’ command in command prompt and hit ‘Enter’ key to execute. This will show you the information about your motherboard model and serial number.
Method 2: Find PC motherboard model and serial number using ‘System Information’
Step 1: Press ‘Windows + R’ keys together from keyboard to open ‘Run Dialog Box’
Step 2: In the opened ‘Run Dialog Box’, type ‘msinfo32’ and hit ‘OK’ button
Step 3: In the opened ‘System Information’ window, check the information in right pane
Method 3: Find PC motherboard model and serial number using ‘PowerShell’
Step 1: Click on ‘Start (Windows)’ icon and type ‘Windows PowerShell’ in Windows Search Box
Step 2: Now, type ‘Get-WmiObject win32_baseboard | Format-List Product,Manufacturer,SerialNumber,Version’ command and hit ‘Enter’ key to execute. This will show the information about your PC motherboard in details.
How to Reinstall or Update Chipset Drivers in Windows 10?
From above methods, you have already note down the detail of your motherboard model and serial number. Now according to your motherboard model, you can update or reinstall your motherboard chipset drivers.
Method 1: Update Chipset Drivers using ‘Device Manager’
Outdated Chipset drivers or problematic chipset drivers can cause several problems in your computer, and you can fix this by updating chipset drivers.
Step 1: Press ‘Windows + X’ keys together from keyboard and select ‘Device Manager’
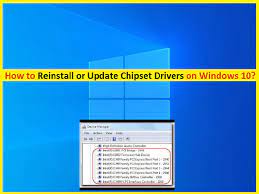
Step 2: In the opened ‘Device Manager’ window, expand ‘System Devices’ category
Step 3: Right-click the chipset driver you want to update and select ‘Update Driver’
Step 4: Select ‘Search automatically for updated driver software’ and follow on-screen instructions to finish update process.
Step 5: Once done, restart your computer to see the changes.
Method 2: Download and Update Chipset Drivers in Windows 10
You can download motherboard chipset drivers from its official site. For example, if you have Intel motherboard chipsets, then you need to download Intel chipset drivers and then install.
Step 1: Open your browser and visit motherboard manufacturer’s official site like ‘Intel’
Step 2: In the homepage, click on ‘Supports’ tab and select ’Download Center’ to open ‘Intel Drivers & Software’ page
Step 3: Click on ‘Chipset’s under ‘Select your product’ and download the latest chipset drivers according to your Operating System version.
Step 4: Now, double-click on ‘Setup file’ or ‘Downloaded files’ and follow on-screen instructions to finish installation.
Step 5: Once done, reboot your computer to see the changes.
Conclusion
I hope this post helped you on how to download, reinstall or Update Chipset Drivers in Windows 10 with easy steps. If you don’t know your motherboard model and serial number, then you can read our instructions mentioned above to known this, and then you can try manual or automatic method to update your motherboard chipset drivers. That’s all. For any suggestions or queries, please write on comment box below.
