
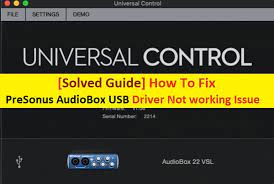
 If you are facing “PreSonus AudioBox can’t connect with Windows PC successfully” problem and noticing “PreSonus AudioBox USB Driver not recognized” issue, then you can follow our instructions to fix it on Windows 10/8.1/8/7 devices.
Here, we are discussing about “PreSonus AudioBox USB Driver” problem in details and providing some recommended tips to fix it. Let’s starts the discussion.
What is PreSonus AudioBox USB Driver?
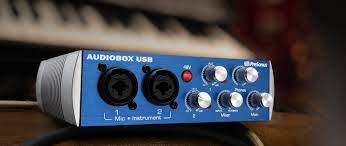
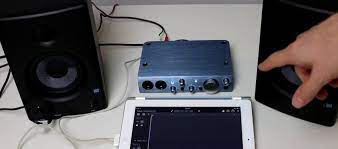
“PreSonus AudioBox USB” is simple, handy little recording interface has just the right features of basic recording needs. This interface is allowing you to plug in and start recording right away. Bus-powered and built to travel, this interface makes recording easy.
“PreSonus AudioBox USB” features screaming-loud headphone output ensures you can hear your music loud and clear, even in noisy locations. It is USB Bus-powered so you can record with it anywhere you can use your device by dropping this interface with your device like Laptop/tabletop devices.
“PreSonus AudioBox USB Driver” is software compatible with your Windows Operating System so you should download it on your device if you are using PreSonus AudioBox USB interface. This driver software works as mediator between the recording hardware device and Operating System like Windows.
Now comes to matter, numerous users are reporting about PreSonus AudioBox USB Driver not recognized on various popular online platforms and asked for the solutions. This problem occurs usually due to missing the driver or corrupted driver software.
Reasons behind this problem
- Missing, outdated or compatible PreSonus AudioBox USB Drivers
- Viruses or malware attack can cause serious problems in your Windows devices
- Missing or corrupted audio drivers
[Tips & Tricks] How to fix PreSonus AudioBox USB Driver not working problem on Windows?
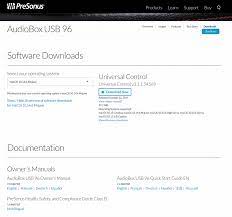
Procedure 1: Download/Install PreSonus AudioBox USB 96 Driver
Step 1: At first, you need to go to Official PreSonus website
Step 2: Find the Driver Download page
Step 3: Select model number of your PreSonus Device like PreSonus AudioBox USB 96 Driver, PreSonus AudioBox 1818vsl Driver, PreSonus AudioBox 44vsl Driver, PreSonus AudioBox ione driver and PreSonus AudioBox 96 Driver as per your PreSonus device model.
Step 4: Select your Windows System (32-bit or 64-bit) and then click on “Download Now” button
Step 5: Once downloaded, double-click on downloaded file and follow On-Screen instructions to install the driver on your Windows
Step 6: Finally, restart your computer to make the new driver take effect.
Procedure 2: Update PreSonus AudioBox USB Driver
Step 1: Press “Windows + X” key from keyboard and select “Device Manager”
Step 2: Locate PreSonus AudioBox USB Device in device list
Step 3: Right-click on it and select “Update Driver software”
Step 4: In the next window, select “Search automatically for updated driver software”. This process will automatically download/install the latest driver software on your machine
Step 5: Once done, restart your computer and please check if the problem is resolved.
Procedure 3: Re-plug PreSonus AudioBox USB Interface
Sometimes, the PreSonus AudioBox USB not recognized problem occurs due to incorrectly plug this interface to Windows device. So, you can also try this procedure. To do so, you need to disconnect or plugged-out PreSonus AudioBox USB and then re-plug it to your PCs/Laptops. Finally, check if the problem is resolved.
Conclusion
I hope this article helped you to “fix PreSonus AudioBox USB Driver not working problem”, “How to install PreSonus AudioBox iOne driver and other driver on Windows device” with easy methods. You can follow the steps mentioned above to fix the issue. If you have any suggestions or queries, please write on comment box given below.
You can try another possible solution to fix this problem i.e., Repair your System with powerful PC Repair Software that has the ability to delete all types of malware, remove faculty software, fix all types of bugs and improves System performance as well.
Is Your PC Behaving Abnormal & Needs Instant Optimzation?
We recommend you to choose Advanced System Repair Suite which is dedicated to offer complete options to optimize a PC, fix any Windows error, and remove malware threats in easy. The software is award winning and suggested as the best malware fix application supporting all Windows versions including XP/Vista/7/8/8.1/10. Just 3 steps to avail error free PC.

- Download Advanced System Repair and install on your PC. (Follow all on screen instructions when installer is executed)
- Click “Scan Your PC” button to scan all present issues, errors, junk files, and malware threats.
- Finally, click “Start Repair” to fix all detected problems in next few minutes.
