
Here, we are discussing about “Logitech Webcam Driver” in details and providing easy steps/methods to download/install driver for your Logitech Camera on your Windows device. It is recommended to download and install camera driver associated with your Logitech camera.
If webcam driver is not installed, then you might face several problems with your webcam including “System can’t detect your camera”, “Logitech camera not recognized”, “Logitech camera driver is not installed properly” and/or other issues.
If you are facing any problem with Logitech Webcam on Windows 10/8/8.1/7 device, then you are try one possible solution to fix i.e., reinstall Logitech Webcam Driver on your System. Let’s starts discussion in details.
Table of Contents
What is Logitech Webcam Software or Driver?
As we know that, Webcams are allowing anyone to communicate with other peoples around the world via video chat, video conferencing with their families, relatives, friends, office members and any other persons from PCs. “Logitech Webcam” is HD webcam that produce high-definition video at much faster frame speed. It results in clearer and smooth video. It becomes easier to share and record HD widescreen videos with this webcam.
“Logitech Webcam” is known for its superior lucidity and quality that enables you to see your family crystal-clear. This aids to make very clear video calls whenever, whenever and without any doubt, it is perfect webcam for those who want to go for trip as well.
“Logitech Webcam Driver” is software for Logitech Webcam attached/installed on your PC/laptop. This driver software is available in seventeen different language including Spanish and English and is available for almost all versions of Windows including Microsoft Windows 10, Windows 8/8.1, Windows 7, Windows XP and Windows Vista.
Why Logitech webcam driver is needed?
To work with Logitech camera on PCs, at first you need to plug your Logitech webcam to your computer and run Logitech webcam software. But this will only work when you have already installed the driver for your Logitech webcam on your computer. No doubt, Logitech webcam software allows you to control or manage webcam to capture impressive photos or videos with just few clicks. However, Logitech camera driver for your webcam model is required to better communication between your camera device and Operating System you have.
Many users reported that the Logitech Webcam software not working on their Windows PCs after upgraded to its latest Windows 10 version. Some user explained that Logitech Webcam issues occur usually due to missing or corrupted webcam driver on computer. It might possible to get this problem if webcam driver is not compatible with your Windows 10 operating System.
Check if specific app (Skype) is allowed to access your camera
If you are sure that driver can’t be problem behind this, then you can check if you have given the permission to specific apps for accessing your camera. For example, if you have blocked accessing your camera in settings for Skype App, then you can’t open camera with this app and notice error “System can’t recognize your camera” while try to access the camera on Skype. In this case, you need to give the permission for specific apps accessing your camera in “Settings App > Privacy”.
If your Logitech webcam is in good condition and you have already given permission for the specific apps for accessing camera, but you still can’t open camera, then it can be due to problem with your Logitech webcam driver. So, you need to download latest driver for your Logitech Webcam and install it in your computer. This will fix Logitech webcam driver problem. Let’s go for solution.
[Tips & Tricks] How to Download/install Logitech Webcam software on Windows 10?
Procedure 1: Free Download Logitech Webcam Driver Windows 10
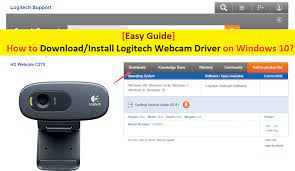
Step 1: At first, you need to visit the “Logitech Download Page”
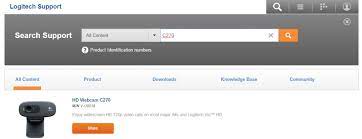
Step 2: Enter your “Webcam model name” like “C270” in search box and click on “More” button for more content
Step 3: Now, click on “Downloads” tab then click on “Drivers” and all available software will be listed for you to choose to download
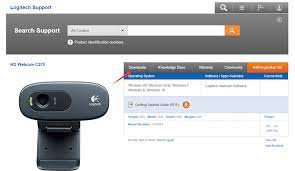
Step 4: Find the drivers from the list to download and select the System to Windows 10
Procedure 2: How do I install Logitech Webcam software or driver?
Step 1: Double-click on download file which you have downloaded (use above procedure to download)
Step 2: In the “Logitech Webcam Software Installation Welcome” dialog box, select “English” from the “Language” drop-down list and click on “Next”
Step 3: Now, plug the camera into USB port on the Administration workstation and click “Next”
Step 4: In the “”Webcam Connected” dialog box appears, click on “Next”
Step 5: Make sure only Logitech Webcam drivers is selected and keep the default Installation directory and then click on “Next”
Step 6: In the “check settings” dialog box, select webcam and microphone as Logitech Webcam and click on “Next”
Step 7: Finally, click on “Finish” once installation is finished.
Conclusion
I am sure this article helped on “How to Free Download/install Logitech Webcam Driver Windows 10” with easy steps. You can follow the steps mentioned above to do this. If you have any suggestions or queries regarding this, please write on comment box given below.
