
Tips to check motherboard model in Windows 11/10/7:
In this article, we are going to discuss on How to check motherboard model, How to check motherboard model in Windows 7, How to check motherboard model in Windows 10, How to check motherboard model in Windows 11. You will be guided with easy steps/methods to do so. Let’s starts the discussion.
‘Check motherboard model’ on Windows 11/10/7:
Motherboard is one of the important components of your desktop/laptop and it is heart of computer. Motherboard on PC/Laptop includes RAM, CPU, graphics card, hard drive, and more. If you want to work in your Windows PC/laptop comfortably and normally, then you should make sure motherboard and its all components are working fine in computer and there is no issue with its components at all.
Motherboard compatibility is also important if you want to use all components and functions in your computer normally. If you want to replace the motherboard hardware or some components from motherboard with another one/new one, then you should make sure the hardware is compatible with your PC/laptop’s motherboard. It means you should check your PC/Laptop motherboard model and integrate/attach hardware device accordingly to your computer. It is possible to check motherboard details in PC. Let’s go for the steps.
How to check motherboard model in Windows 11/10/7?
Method 1: How to check motherboard model in Windows 11 via Command Prompt?
![]()
Step 1: Type ‘cmd’ in Windows Search Box and press ‘SHIFT + ENTER’ keys on keyboard to open ‘Command Prompt as Administrator’
Step 2: Type the following command and hit ‘Enter’ key to execute.
wmic baseboard get product,manufacturer,version,serialnumber
Step 3: Once executed, you can see some details of your motherboard.
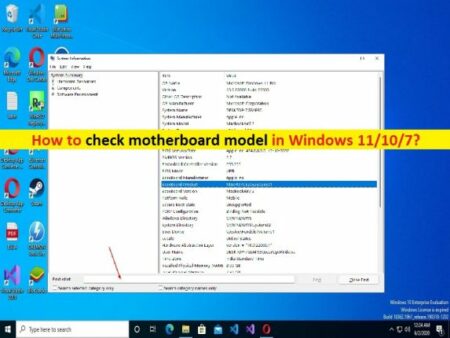
Method 2: How to check motherboard model in Windows 7/10/11 via System Information app?
![]()
Step 1: Press ‘Windows + R’ keys on keyboard, type ‘msinfo32’ in ‘Run’ window and hit ‘Ok’ button to open ‘System Information’ app
Step 2: In the opened window, go to find items regarding Baseboard, including Baseboard manufacturer, Baseboard product, and Baseboard version.
Method 3: How to check motherboard model in Windows 11 via PowerShell?
Step 1: Type ‘PowerShell’ in Windows Search Box, right-click on ‘Windows PowerShell’ from result appear, and select ‘Run as Administrator’
Step 2: Type the following command and hit ‘Enter’ key to execute.
– Get-WmiObject win32_baseboard | Format-List Product,Manufacturer,SerialNumber,Version
Step 3: Once executed, you can see the some details about your motherboard model.
Method 4: How to check motherboard model via Motherboard Check Tool
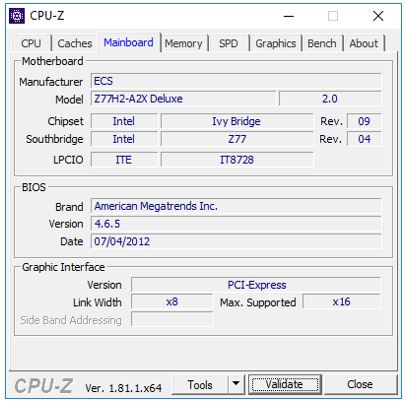
You can also try to check motherboard model in your Windows computer using a motherboard check tool. To do so, you need to search for ‘tool to check motherboard model for Windows’ and download & install and then use it in your device to perform this. You can try CPU-Z, HWiNFO, etc for this purpose.
Fix Windows PC issues with ‘PC Repair Tool’:
‘PC Repair Tool’ is easy & quick way to find and fix BSOD errors, DLL errors, EXE errors, problems with programs/applications, malware or viruses infections in computer, system files or registry issues, and other system issues with just few clicks.
⇓ Get PC Repair Tool
Conclusion
I am sure this article helped you on How to check motherboard model, How to check motherboard model in Windows 7, How to check motherboard model in Windows 10, How to check motherboard model in Windows 11 with easy ways. You can read & follow our instructions to do so. That’s all. For any suggestions or queries, please write on comment box below.
