
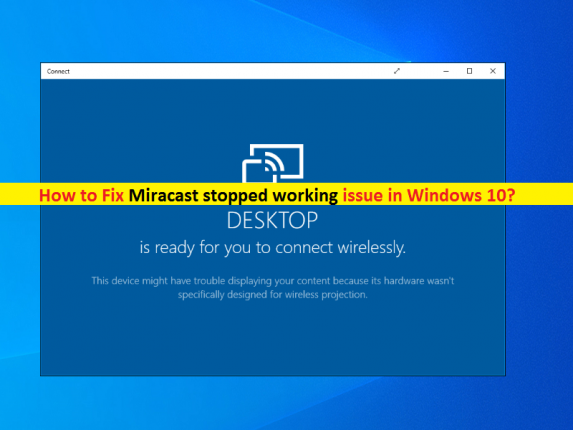
What is ‘Miracast stopped working’ issue in Windows 10?
In this post, we are going to discuss on ‘How to fix Miracast stopped working Windows 10’. You will be guided here with easy steps/methods to resolve the issue. Let’s starts the discussion.
‘Miracast’: Miracast is standard for wireless connections from sending devices including laptops, tablets, or Smartphone to display receivers like TVs, monitors or projectors, introduced by Wi-Fi Alliance. Device that are Miracast-certified can communicate with each other, regardless of manufacturer. Miracast employs the P2P Wi-Fi Direct Standard. Miracast can stream videos that are in 1080p, media with DRM like DVDs, and protected premium content streaming, enabling devices to stream future films and other copy-protected materials.
However, several users reported that they faced ‘Miracast stopped working Windows 10’ issue while they tried to connect their Windows 10 PC/laptop to TVs using Miracast. This issue prevents you from using Miracast and result in fails to establish the connection between your Windows computer and TVs. This issue indicates that can’t connect your PC to display, text on your display is fuzzy or images stutter, audio still plays on your computer but on TV, Miracast stopped working after Windows update.
There could be several reasons behind this issue including incompatibility issue between Miracast and your computer, issue with network adapter driver and graphics card drivers, incompatible due to your display settings, and others. It is possible to resolve the issue with our instructions. Let’s go for the solution.
How to fix Miracast stopped working Windows 10?
Method 1: Fix Miracast stopped working issue with ‘PC Repair Tool’
If this issue is occurred due to some problems in Windows computer, then you can try to fix the issue with ‘PC Repair Tool’. This software offers you to find and fix BSOD errors, DLL errors, EXE errors, problems with programs/applications, malware or viruses issues, system files or registry issues, and other system issues with just few clicks.
⇓ Get PC Repair Tool
Method 2: Check for Miracast Support
This problem can be occurred if your Windows 10 PC/laptop is not eligible to run Miracast. You need to check if your PC supports Miracast before using it.
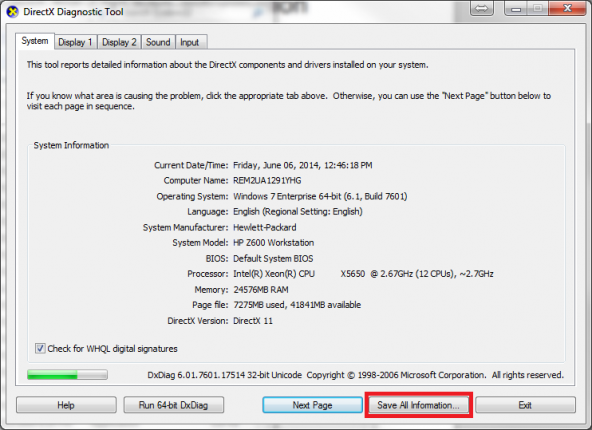
Step 1: Press ‘Windows + R’ keys on keyboard, type ‘dxdiag.exe’ in the opened ‘Run’ window and hit ‘Ok’ button to open ‘DirectX Diagnostic Tool’
Step 2: In the opened window, hit ‘Save all information’ option. Try to save ‘DxDiag.txt’ file on your Windows desktop so as to find it more easily.
Step 3: Now, check in all the information whether your PC is eligible to run Miracast or not.
Method 3: Update Graphics card driver and network adapter drivers in Windows 10
Another possible way to fix the issue is to update graphics card driver and network/WiFi adapter driver in your computer.
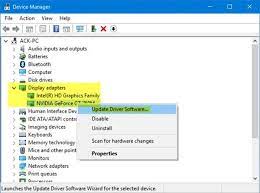
Step 1: Press ‘Windows + X’ keys on keyboard and select ‘Device Manager’
Step 2: Expand ‘Display Adapters’, right-click on your graphics card and select ‘Update Driver’. Follow on-screen instructions to finish update process.
Step 3: Repeat the same step to update your network/WiFi adapter that is located under ‘Network Adapters’ category
Step 4: Once updated, restart your computer and check if the error is resolved.
Download or reinstall network/WiFi driver and graphics driver update in Windows 10 [Automatically]
You can also try to update network/Wifi driver, graphics card driver and all other Windows drivers with ‘Automatic Driver Update Tool’. You can get this tool through button/link below.
⇓ Get Automatic Driver Update Tool
Method 4: Re-connect the computer and the display
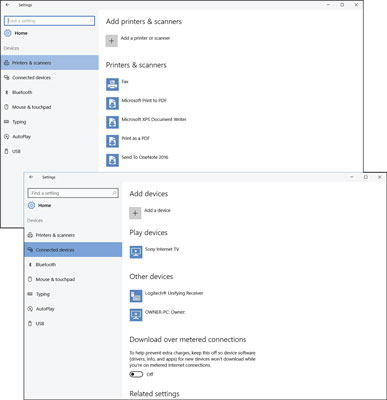
Step 1: Open ‘Settings’ App in Windows 10 via Windows Search and go to ‘Devices > Display’
Step 2: Select ‘Remove Device’, and after few seconds, add this device again by navigating ‘Settings > Devices > Add Bluetooth and other devices > Wireless display or dock’ and select your external display like TV. Check if it works for you.
Method 5: Try a wireless display adapter
This issue can be occurred if your Windows 10 PC doesn’t support Miracast. In such case, you can try wireless display adapter in your computer. To do so, buy a wireless display adapter and plug into your computer and check if you can use Miracast in your device without any issue.
Method 6: Change display screen resolution
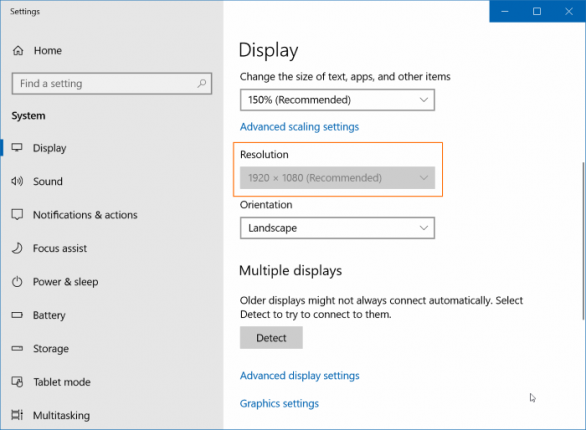
Step 1: Open ‘Settings’ App in Windows 10 and go to ‘System > Display’
Step 2: Select dropdown under ‘Resolution’ change it to another resolution option and check if it works for you. Restart your computer to see the changes and check if it works.
Method 7: Change Default Playback Device
This issue can be occurred if you have connected the computer and display but the audio plays on computer instead of on external monitor. You can change default audio playback device in order to fix the issue.
Step 1: Right-click on ‘Speaker/Volume’ icon at right corner in taskbar and select ‘Playback Devices’
Step 2: In the opened window, check if Miracast wireless display is select as default device. If not, right-click on the device, and select ‘Set as default device’ option to do so.
Method 8: Change a Miracast Wireless Display Adapter
If the issue is still persist, then you can try to fix the issue by buying another Miracast wireless display adapter and then try to connect again. Check if new Miracast wireless display adapter works for you.
Conclusion
I am sure this post helped you on How to fix Miracast stopped working Windows 10 with several easy steps/methods. You can read & follow our instructions to do so. That’s all. For any suggestions or queries, please write on comment box below.

