
What is ‘failed to create/open the internal network’ error – VirtualBox error in Windows 10/11?
If you are experiencing VirtualBox failed to open the internal network, VirtualBox failed to create the internal network error on Windows 10/11 computer when you try to start a VM (Virtual Machine), then you are in right-place for the solution. Here, you are provided with easy steps/methods to resolve this problem. Let’s starts the discussion.
Table of Contents
‘Failed to open the internal network/ failed to create the internal network’ error – VirtualBox error:
It is common Windows Problem considered as VirtualBox – Virtual Machine Issue. This error is usually appeared when you try to start a Virtual Machine in VirtualBox in your Windows 10/11 computer. If you not aware, VirtualBox or Oracle VirtualBox is type-2 hypervisor for x86 virtualization designed & developed by Oracle Corporation. It can be installed on Microsoft Windows OS, macOS, Linux, Solaris, and OpenSolaris, and there are also ports to FreeBSD, and Genode.
Some common VirtualBox failed to create the internal network errors:
- Could not start the machine <machine’s name> because the following physical network interfaces were not found: <Network Adapter name> (adapter 1). You can either change the machine’s network settings or stop the machine.
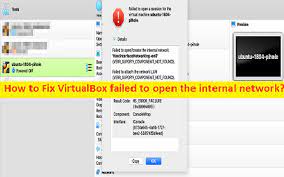
- Failed to open a session for the virtual machine. Failed to open/create the internal network ‘HostInterfaceNetworking-Ethernet-Name’ (VERR_SUPDRV_COMPONENT_NOT_FOUND).
- Failed to open/create the internal network ‘HostInterfaceNetworking-VirtualBox Host-Only Ethernet Adapter (VERR_INTNET_FLT_IF_NOT_FOUND). Failed to attach the network LUN (VERR_INTNET_FLT_IF_NOT_FOUND).
However, several users reported they faced failed to create/open the internal network on VirtualBox when they start a virtual machine after Windows 10/11 computer restart. The possible reasons behind the issue can be the issue with VirtualBox Host-Only Ethernet Adapter, incorrect Network Adapter in VirtualBox VM, issue with network settings, and the issue with VirtualBox software itself. It is possible to fix the issue with our instructions. Let’s starts the discussion.
How to Fix VirtualBox failed to open the internal network error?
Method 1: Fix VirtualBox failed to open/create the internal network error with ‘PC Repair Tool’
‘PC Repair Tool’ is easy & quick way to find and fix BSOD errors, DLL errors, EXE errors, problems with programs/applications, malware or viruses infections in computer, system files or registry issues, and other system issues with just few clicks.
⇓ Get PC Repair Tool
Method 2: Perform System Restore
You can perform system Restore in computer to restore your computer to valid restore point according to date & time when there was no issue at all in computer.
Step 1: Press ‘Windows + R’ keys on keyboard, type ‘rstrui’ in ‘Run’ window and hit ‘Ok’ button to open ‘System Restore’ app
Step 2: Click ‘Next’ button, select a valid restore point according to date & time when there was no issue at all in computer, and then hit ‘Next > Finish’ to start restoring process. Once done, check if the issue is resolved.
Method 3: Set the correct Network Adapter in VirtualBox Virtual machine
This issue can be occurred due to incorrect network adapter in VirtualBox VM in Windows 10/11 computer. You can fix the issue by setting the correct network adapter in VM.
Step 1: Open ‘Device Manager’ app in Windows PC via Windows Search Box and expand ‘Network Adapters’ category
Step 2: Make a note of active network adapter, and then open ‘Network Settings’ of VirtualBox’s VM and make sure the same network adapter is selected. If not, select the correct network adapter and save the changes. Once done, check if the issue is resolved.
Method 4: Disable/Enable or Update VirtualBox Host-Only Ethernet Adapter
Another way to fix the issue is to disable/enable or update VirtualBox Host-Only Ethernet Adapter in Device Manager.
Step 1: Open ‘Device Manager’ app in Windows PC via Windows Search Box and expand ‘Network Adapters’ category
Step 2: Find and right-click ‘VirtualBox Host-Only Adapter’, and select ‘Disable Device’ to disable it, and then start VirtualBox VM and check if the issue is resolved.
Step 3: If not, open ‘Device Manager’ app again in computer and expand ‘Network Adapters’ category
Step 4: Right-click on VirtualBox Host-Only Adapter, and select ‘Update Driver’, and follow on-screen instructions to finish update. Once done, check if the issue is resolved.
Download or reinstall VirtualBox Host-Only Network Adapter Update in Windows PC [Automatically]
You can also try to update all windows drivers including VirtualBox Host-Only Network Adapter update using Automatic Driver Update Tool. You can get this tool through button/link below.
⇓ Get Automatic Driver Update Tool
Method 5: Disable and enable VirtualBox NDIS6 Bridgeds Network Adapter
Step 1: Open ‘Network connections’ app via Windows Search Box, right-click on VirtualBox Host-Only Network Adapter, and select ‘Properties’
Step 2: Find and deselect ‘VirtualBox NDIS6 Bridged Networking Driver’, and hit ‘Ok’ button to save the changes.
Step 3: Now, re-open Properties of VirtualBox Host-Only Adapter, and enable ‘VirtualBox NDIS6 Bridged Networking Driver’ and hit ‘Ok’ button to save the changes, then check if the issue is resolved.
Method 6: Change Google Public DNS
You can change DNS server in computer to Google Publix DNS in order to fix.
Step 1: Open ‘Network Connections’ setting app via Windows Search Box and go to ‘Change Adapter Settings’
Step 2: Right-click on your network adapter and select ‘Properties’. Select ‘Internet Protocol Version 4 (TCP/IPv4)’ and hit ‘Properties’
Step 3: Select ‘Use the following DNS server addresses’ radio option, type ‘8.8.8.8’ and ‘8.8.4.4’ in preferred and alternate DNS server address field, and then hit ‘Ok > Apply > Ok’ button to save the changes. Once done, check if the issue is resolved.
Method 7: Reinstall VirtualBox
If the issue is still persist, you can try to fix the issue by uninstalling and then reinstall VirtualBox Software in computer.
Step 1: Open ‘Control Panel’ app in Windows PC via Windows Search Box and go to ‘Uninstall a Program > Programs & Features’
Step 2: Find and right-click on ‘VirtualBox’ software, and select ‘Uninstall’ to uninstall it and after that, restart your computer
Step 3: After restart, download and reinstall VirtualBox Software again computer and then check if the issue is resolved.
Conclusion
I am sure this post helped you on How to fix VirtualBox failed to open the internal network, VirtualBox failed to create the internal network error in Windows 10/11 with easy ways. You can read & follow our instructions to do so. That’s all. For any suggestions or queries, please write on comment box below.

