
In this article, we are discussing about “HP LaserJet P1102w Printer Driver Software” in details and providing some recommended steps/procedures to fix problem with HP LaserJet P1102w Printer on Windows PCs. One possible solution to fix this issue is to Reinstall HP LaserJet P1102w Driver on your computer. Let’s starts the discussion.
About HP LaserJet P1102w Printer Driver
Here, letter ‘w’ in “HP LaserJet P1101w” is considered as “Wireless” or “Wi-Fi”. This printer has released by HP Company which is excellent chose for small business who wants only printouts in huge number of amount in the month. This HP Printer works the command of your computer and all the communication is based on their driver.
HP LaserJet P1102w Printer Driver works as mediator between your computer and printer which allows printer to works the command of computer and print the documents as per command given by your computer. In simple word, we can say that you need to download/install HP LaserJet P1102w Driver in your machine if you want to print documents stored in your PC using HP LaserJet P1102w Printer.
This driver is very sensitive and it can corrupt itself due to unusual restart or shutdown of your computer or other reasons. Users reported about HP LaserJet P1102w Printer problem on various popular online platforms and asked for the solution. They explained that the issue occurs usually due to missing or corrupted Printer driver while some users reported that the problem might occurs if printer device is not connected to computer properly. Let’s go solution.
[Tips & Tricks] How to fix HP LaserJet P1102w Printer problem?
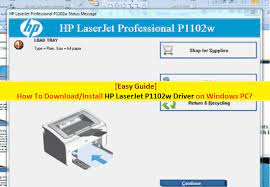
Procedure 1: How to Download/Install HP LaserJet P1102w Printer Driver
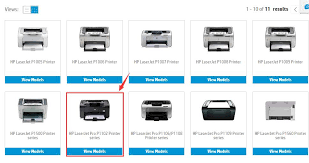
Step 1: At first, you need to download the printer driver from “HP Official website”
Step 2: Connect your Printer to computer using USB cable that comes with the printer
Step 3: Now, turn ON your computer and Printer device as well
Step 4: Double-click on “Downloaded File” and follow on-screen instructions to finish the install process
Step 5: Once uninstalled, restart your computer. Now, you can start printing with HP LaserJet P1102w Printer
Procedure 2: How to Add HP LaserJet P1102w Printer to computer using Control Panel
Step 1: Press “Windows + R” keys together from keyboard to open “Run Dialog Box”
Step 2: In the opened “Run Dialog Box”, type “Control Panel” and hit “OK”
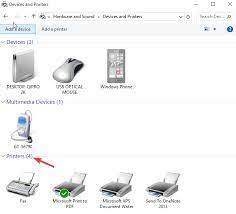
Step 3: In the opened “Control Panel” window, click on “View Devices & Printer” or “Fax & Printers”
Step 4: Now, click on “Add a Printer”
Step 5: Give the path of drivers where have extracted the setup file and follow on-screen instructions to finish
Step 6: Once finished, you can use printer for printing
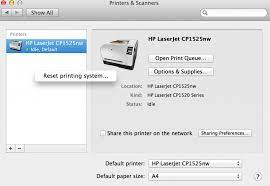
Procedure 3: Reset Printing System
Step 1: Open “Control Panel” and go to “Hardware and Sound > Devices and Printers”
Step 2: Select “Printers” option
Step 3: Right-click on your printer in the list and select “Reset Printing System”
Step 4: Give Administrative privilege and click on “Ok” to confirm the resting process
Step 5: After that, click on “+” sign and select your printer and press “Add”
Procedure 4: Set the USB connection as default printer
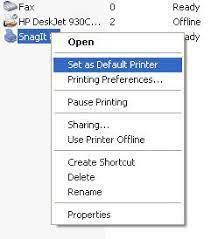
Step 1: Open “Control Panel” and go to “Hardware and Sound > Devices and Printers”
Step 2: Right-click the printer and select “Properties”
Step 3: Select the “Ports” from the list to set as default printer.
Step 4: Right-click on it and choose “Set as Default printer”
Procedure 5: Check for Windows update
Step 1: Press “Windows + I” keys together from keyboard to open “Settings” App
Step 2: Go to “Update & Security > Windows Update” and select “Check for updates” and accept all updates
Procedure 6: Disable Normal startup
Step 1: Press “Windows + R” keys together from keyboard and type “msconfig” and then hit “Enter” key
Step 2: In the opened “System Configuration” window, select “selective startup” in “General” tab and clear the “Load Startup items” checkbox
Step 3: Now, click on “Services” tab and select “Hide All Microsoft Services” checkbox
Step 4: Click on “Disable All”. After that, click on “Apply” and “OK” button
Procedure 7: Download and update HP LaserJet P1102w Printer Driver automatically
Download software for drivers update
If you don’t have patience or computer skills to update your Printer drivers manually, then you are in right place. It is possible to download and update this printer driver automatically using “Driver Easy” driver update software which allows you to download the latest driver update in your computer. You can use above link to download this driver update software.
Conclusion
I am sure this article helped you to “How to fix HP LaserJet P1102w Printer problem” “How to Download/Install HP LaserJet P1102w Driver ” with easy steps. You can read & follow the steps/methods mentioned above to do this. If you have suggestions or queries regarding this, please write on comment box given below.
If you are unable to Fix HP LaserJet P1102w Printer problem with the solutions mentioned above, then it might possible that your System has infected with malware or viruses. According to security researchers, malware or viruses cause several damages in your computer.
In this case, you can scan your computer with powerful antivirus software that has the ability to delete all types of malware or viruses from System.
You can also try another possible solution to fix this issue. We recommended you to Repair your PCs/laptops with powerful PC Repair Tools/Software that has the ability to remove all the faculty software, clean System registry, remove all types of malware or viruses, fix all types of bugs or errors and improves System performance as well. You can download powerful PC Repair Tool/Software via “Download” link below.
Is Your PC Behaving Abnormal & Needs Instant Optimzation?
We recommend you to choose Advanced System Repair Suite which is dedicated to offer complete options to optimize a PC, fix any Windows error, and remove malware threats in easy. The software is award winning and suggested as the best malware fix application supporting all Windows versions including XP/Vista/7/8/8.1/10. Just 3 steps to avail error free PC.
- Download Advanced System Repair and install on your PC. (Follow all on screen instructions when installer is executed)
- Click “Scan Your PC” button to scan all present issues, errors, junk files, and malware threats.
- Finally, click “Start Repair” to fix all detected problems in next few minutes.
