
In the previous blog we discussed about how to control Acer laptop fan speed and here in this blog we will discuss another irritating issue faced by several users and that is Volume control on Acer Laptop not working from Taskbar. Though the issue is quite common and has been encounter by the users of other models too. As we have earlier mentioned that the issue is quite common and after investigating about the issue we concluded that the issue is encounter by the users of every Windows Versions including Windows 10.
As per the Reports users have claimed that they are unable to open the sound control bar from Taskbar in Acer Laptop, we have enlisted few common issues which are related to the above mention issue and once can follow our guidelines that we are going to address in this article.
- The volume control program is not installed
- Taskbar volume icon won’t open
- Volume slider not working
- Volume mixer Wont open
- Volume icon not working
- Volume icon is not showing in Taskbar
- Taskbar volume icon greyed out
- Keyboard volume control not working
Recommended Troubleshooting Methods forVolume control on Acer Laptop not working
Method 1: Reset the Audio Service
In the first method we suggest you to reset the audio service and to do so follow the below mention instructions:
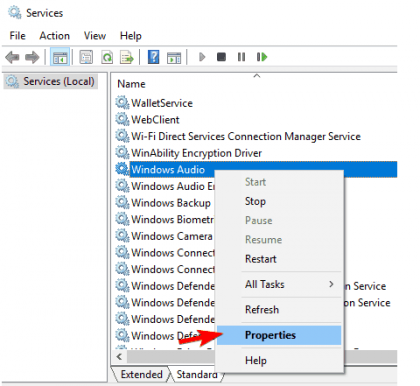
Step 1: Navigate to Search, type services.msc and then go to the Services
Step 2: Then find Windows Audio, right-click on it and go to Properties
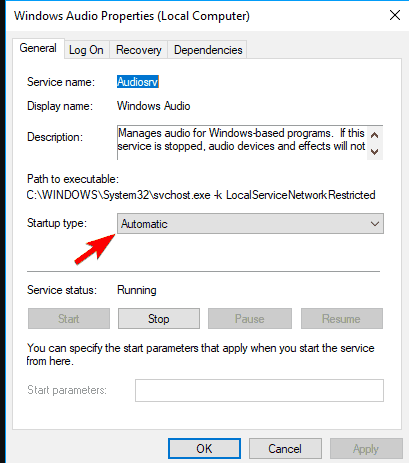
Step 3: First ensure that Startup type is set to Automatic
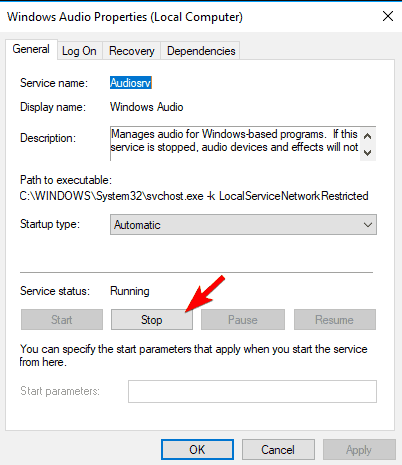
Step 4: Tap on Stop and wait for the process to stop
Step 5: Click Start again
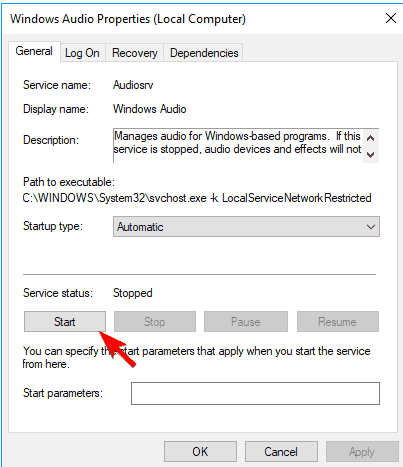
Step 6: Finally restart your computer and then check if the issue resolved or not.
Method 2: Perform an SFC Scan
If the above mentioned method didn’t works for you then we suggest you to perform a SFC Scan, it’s an inbuilt tool to repair the damaged system files, so follow the below mention steps to do so:
Step 1: Press Windows key + X op open Win + X menu
Step 2: Then select Command Prompt (Admin) from the appeared list
Step 3: You can also use PowerShell (Admin), if the command prompt isn’t available.
Step 4: Once the Command Prompt open then enter the below mention command and press Enter:
sfc/scannow
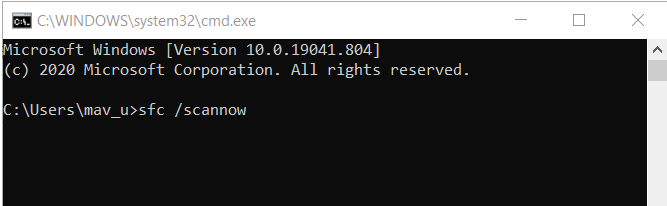
Step 5: The scanning will start now and you need to wait till the scanning gets completed.
Though the SFC scan is a reliable inbuilt tool and it has a potential to repair the damaged files but sometimes your system files get fully corrupted and in such situation SFC Scan fails to repair the damage, in such scenario you need an expert repair tool. This expert tool will thoroughly scan the system files and fix the detected errors and will also immune your system from several malfunctioning of the Windows.
⇓Get PC Repair Tool from Here⇓
Method 3: Install the Sound Drivers
Here in this method we suggest you to install the Sound Drivers and to do so follow the below mention guidelines:
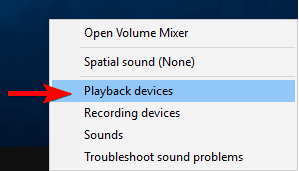
Step 1: Right-click on Speaker icon in the taskbar and navigate to Playback devices
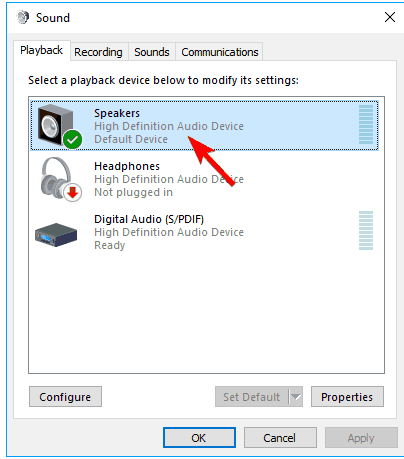
Step 2: Then double click on the default playback device
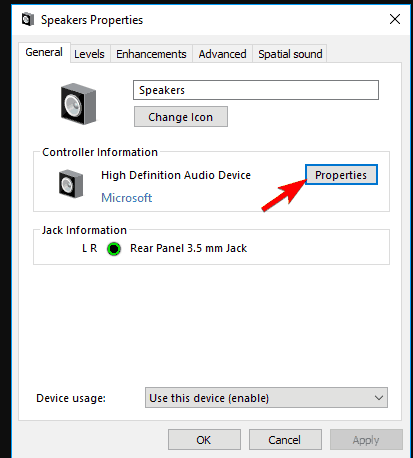
Step 3: In the Controller Information, tap Properties
Step 4: Go to Change Settings and then navigate to the Driver tab
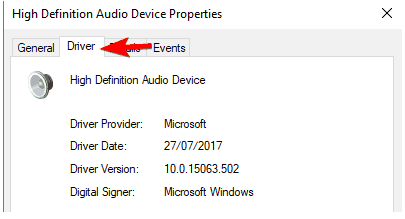
In the driver tab, you will also get option for updating the sound driver and we suggest you to do so and in order to proceed with this you need to click on Update Driver. But if the Sound driver is unavailable then look online for the most suitable driver for sound card and then install it and then restart your computer.
Update drivers automatically
If you don’t have technical skills and have no idea about the drivers then we strongly recommend you to update your drivers with an automatic driver tool. This tool will update your driver to the latest version and will fulfil all the driver related requirements of your machine in just few clicks.
⇓Get Driver Tool
Method 4: Check if the Audio Manager is enabled
Step 1: First of all Press Ctrl + Shift + Esc to start the Task Manager
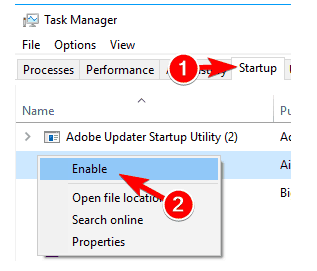
Step 2: Once the Task Manager opens, navigate to startup tab
Step 3: You will get the list of all startup applications
Step 4: search for Audio Manager on the list
Step 5: Right-click it and select Enable from the menu
Step 6: Once you have enabled the Audio Manager then restart your computer
Note: Some audio devices don’t require Audio Manager to work, so if you can’t find Audio Manager on the list then this solution is not for you.
Method 5: End the SndVol.exe process
Several users have claimed success after ending SndVol.exe process, so we suggest you to do the same by following the below mention instructions:
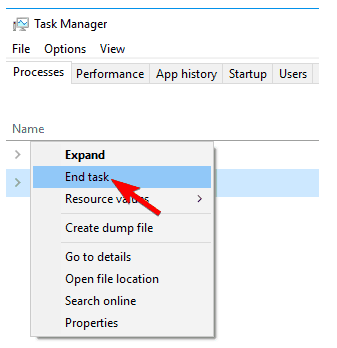
Step 1: Open Task manager
Step 2: You will be prompted with all the active processes
Step 3: Then locate SndVol.exe or Volume Mixer
Step 4: After that right-click and choose End Task
Step 5: Finally close Task Manager
Method 6: Run Hardware and Devices Troubleshooter
Sometimes one can also fix the Volume control on Acer Laptop not working issue simply by running hardware and device Troubleshooter. To do so follow the below mention steps:
Step 1: Press Win + I key to open Settings app
Step 2: Once the Settings app opens, go to the Update and Security section
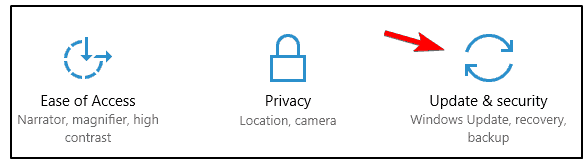
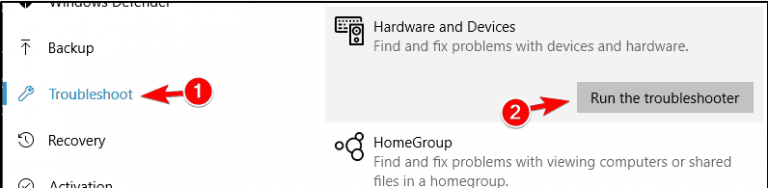
Step 3: Choose Troubleshoot from the menu on the left and in the right pane select Hardware and Devices.
Step 4: tap on the Run the Troubleshooter button
Step 5: Now the troubleshooter will start and once it gets completed check if the issue resolved or not.
Conclusion
That’s all about Volume control on Acer Laptop not working. I hope you liked the article and it was helpful for you as well.
