
What is ‘missing or failed Printhead error code 0xc19a0003’?
If you are facing ‘missing or failed Printhead error code 0xc19a0003’ while trying to print a document using HP Printer and your printer shows this error instead of printing anything, then you are in right place for the solution. You will be guided here with easy steps/methods to resolve the issue. Let’s starts the discussion.
‘missing or failed Printhead error code 0xc19a0003’: It is common printer error appears usually on ‘Printer’s Control Panel’. This error indicates the Printhead is missing or failed to load, or not correctly detected/installed that’s why you are receiving this error. This error prevents you from printing anything using your printer. Mostly, this error is appeared on HP-model Printers. Let’s take a look at error message.
“Missing or Failed Printhead
The printhead appears to be missing, not detected, or incorrectly installed.
Error code: 0xc19a0003”
This HP Printer error indicates that due to problems with ink system of device or its printhead, printing process may fail. This error is occurred usually when your printer’s cartridge is unable to supply a sufficient amount of ink to printhead. The possible reason behind this issue can be outdated or corrupted HP Printer driver and firmware, issues associated to software and hardware may result in this error, and printhead of your printer may be carrying unresolved issues. In such case, you can update your printer firmware to available latest version in order to fix the issue.
Table of Contents
Some common missing or failed Printhead errors:
- Printhead missing failed or incompatible 0xc19a0003
- missing or failed Printhead HP Officejet pro 8610
- missing or failed Printhead HP Photosmart 7520
- HP Officejet 6700 premium Printhead
- The Printhead appears to be missing
- Missing or failed Printhead HP 8610
- The Printhead appears to be missing not detected or incorrectly installed
- Missing or failed Printhead HP Officejet 8620
- missing or failed Printhead HP 7520
- missing or failed Printhead HP 7110
- HP Officejet 6600 missing or failed Printhead
- missing or failed Printhead 8600
How to fix missing or failed Printhead error code 0xc19a0003 on HP Printer?
Method 1: Perform HP Printer Reset operation
One possible way to resolve this issue is to perform HP printer reset operation.
Step 1: Turn ON your HP Printer if turned OFF, and then disconnect the power cord from printer when printer turned ON
Step 2: Disconnect the power cord from power outlet and wait for 60 seconds
Step 3: After that, plug the power cord back into power outlet, and connect power cord to your HP printer
Step 4: Now, turn ON your printer and check if the error is resolved.
Method 2: Reseat Printhead of HP Printer
It might possible your Printer is unable to detect printhead even when it is installed. However, you can fix this issue by reseating printhead of HP printer.
Step 1: At first, open your printer’s cartridge entrance door by dragging the printer’s left slot in the forward direction
Step 2: Now, disconnect the power cable from printer
Step 3: Now, pull the latch upside on right-side portion of Printer’s carriage
Step 4: Drag the ‘Printhead’ only a bit not completely out from the carriage
Step 5: Now, put your ‘Printhead firmly inside the carriage’ to set it completely
Step 6: Put the printer’s carriage latch down and then close ‘Printer’s cartridge entrance door’
Step 7: Now, connect power cable to printer and turn ON your printer, and check if the issue is resolved.
Method 3: Clean Printer’s Ink Cartridge
One possible way to resolve this issue is to clean printer’s ink cartridge. To do so, you have to eject printer’s ink cartridge from printhead. Once removed, you can clean the ink cartridge’s copper portion using distilled water and lint-free cloth. After that, let the cartridges dry by whipping them with clean dry cloth, and once done, put ink cartridge back to printer and turn ON your printer, and check if the error is resolved.
Method 4: Update Your HP Printer firmware
Step 1: Open your browser on computer and visit ‘HP Printer’s Drive and Software Downloads’ page
Step 2: Search for printer’s firmware according to your printer model number, once you find the correct firmware with latest version, hit ‘Download’ button and save the firmware setup file in your computer’s drive
Step 3: Now, find and double-click on downloaded firmware setup file and follow on-screen instructions to finish installation.
Download or reinstall HP Printer drivers [Automatically]
You can also try to download or reinstall Printer drivers with ‘Automatic Driver Update Tool’. This software will automatically find and install the latest updates for all Windows drivers including printer drivers. You can get this tool through button/link below.
⇓ Get Automatic Driver Update Tool
Method 5: Replace your printer printhead
If the problem is still persist, you can fix the issue by replacing your HP printer printhead. Before removing up the printer’s cartridge, make sure you have new printhead to replace with your old printer printhead. It is recommended you not keeping the cartridges outside the printer for more than 30 minutes in order to prevent cartridge and printer from damages.
Step 1: Check for printhead warranty status. If your printer’s printhead cartridge is defective, then at first you should check if it is under warranty period or not. And also, make a visit to printer and to ‘Page Yield Overview’ for getting an idea about the warranty period for toner or ink supplies.
Step 2: Replace the printhead if it is under warranty period, and you will get a new printhead assembly kit along with instructions guide to setup. Now, install your setup cartridges and then install printhead.
Step 3: Replace the older printhead with new one
Method 6: Replace Non-HP cartridges
This issue can be occurred if you are using Non-HP cartridges in your HP Printer. You can fix the issue by replacing Non-HP cartridges with a genuine HP cartridges pack. Purchase a new genuine HP cartridge pack and replace the old non-HP cartridge with new one, and turn ON your HP Printer, and check if it works without any issue.
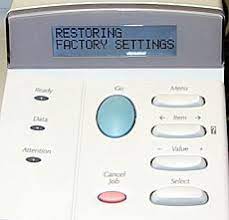
Method 7: Perform HP Printer factory reset
If the problem is still persist, then you can perform factory reset of your HP printer in order to resolve the issue. To do so, you need to press back button at least 4 times unless you get ‘Support’ menu window. Once the menu is appeared, find and go to ‘Reset’ menu. This will show you list of option reset options including ‘Full Reset’, ‘Partial Reset’ and ‘semi-full reset’ options.
‘Partial Reset’ of HP printer only refreshes the printer and free up waste memory from the printer. This process can fix problems like cartridges errors and slow printing, etc. ‘Semi-Full Reset’ of HP printer removes all custom settings from the printer and takes it back to the default factory settings status. ‘Full Reset’ is mostly effective reset type when all other reset procedures fails to resolve the issue. This reset process removes entire printer settings and any type of interruptions meanwhile the reset process takes the printer to unusable state. So, you can try any of these reset processes as per requirement and once done, check if the issue is resolved.
Method 8: Monitor the Inside Circuitry
This issue can also be occurred if microchip’s connection inside the printer that connects the cartridges with printer, gets loose. This chip’s connection loose issue can cause the circuit failure issue between the cartridges and printer. To check whether the chip connection is correct or not, follow the steps below.
Step 1: At first, turn OFF your printer and then disconnect printer power cable from power outlet
Step 2: Now, open Printer Case/Cover and bring out the cartridge from it.
Step 3: Look for microchip that is present over the cartridge toner and check whether it is clean or not.
Step 4: If no chip excessive carbon gets accumulated, then wipe out using an eraser. You can also try to clean the metal pins present within the printer.
Step 5: Make sure pins and microchip is properly connected. And then place the cartridge inside the pointer, and close printer cover.
Step 6: Once done, connect printer power cable to power outlet and turn ON HP printer, and check if it works without any issue.
Fix Windows PC problems with ‘PC Repair Tool’ [Recommended Solution]
If you are facing any issues or bugs in Windows computer, then you can try to fix the issue with ‘PC Repair Tool’. This software offers you to find and fix BSOD errors, DLL errors, EXE errors, problems with programs/applications, malware or viruses issue, system files or registry issues, and other system issues with just few clicks. You can get this tool through button/link below.
Conclusion
I am sure this article helped you on How to fix missing or failed Printhead error code 0xc19a0003 on HP Printer with several easy steps/methods. You can read & follow our instructions to do so. If the post really helped you, then you can share this post with others to help them. That’s all. For any suggestions or queries, please write on comment box below.

