Internet is full of forums where users are asking how to create new user in Windows 10. If you share your PC other people, then you must have more than one account so that other could not able to access and view your files. Windows 10 allows you to create several user accounts with different levels of functionalities depending on whom you are adding. It lets everyone to have a personal space with their desktop customization, separate files, settings based on particular requirements. As you create an account, you need to choose a password and always keep it in your mind. If you forget it or lose it, we won’t be able to access that particular user account.
Initially, log into your own account and then visit ‘Start > Settings > Accounts’.
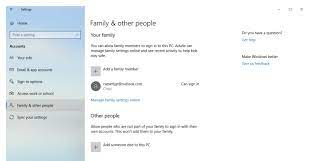
You will see various options in the left panel. Select ‘Family & other people’ option where you can create two different kinds of accounts Family & other people.
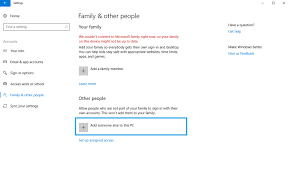
- Now, click on ‘Add someone else to this PC’.
- Tap on ‘I don’t have this person’s sign-in information’ and on the next page, click on ‘Add a user without a Microsoft account’.
- Here, you have to enter a user name, passwords, password hint or chose security questions and then click on ‘Next’.
How to create administrator account in Windows 10?
Users with administrator account have complete control over a PC. They can install applications, modify settings globally, get through the User Account Control (UAC) when they need to execute a task and everything else. To make an administrator account, follow the below steps:
- First of all, click on the ‘Start’ button.
- Now, go to ‘Settings’ and then tap on ‘Accounts’.
- After that, tap on ‘Family & other people’ and then click ‘Add someone else to this PC’.
- After that, enter the Microsoft account and tap on ‘Next’.
- Once done, tap on ‘Finish’.
- Now, you will come to the ‘Family & other people’ option again.
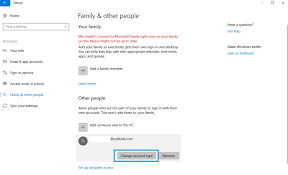
- Tap on the account you just created under ‘Other people’ section and then click on ‘Change account type’.A new account is set to Standard by default, you have to click on it and choose ‘Administrator’.
- Once done, tap on ‘OK’.
- That’s it, you have successfully created a new admin account using Microsoft account.
You can also create Admin account without logging in by booting your system from a Windows 10 setup/installation disc. However, in the absence of a Windows 10 disc, burn a Windows 10 ISO to a USB or CD/DVD drive to immediately create one.
How to add a guest account on Windows 10?
Guest account becomes very handy when we have to share our Windows system with someone. Such types of accounts can be very useful in such situations when we want to give other user limited access to the PC. Although, the feature of adding guest account was removed in Windows 10 all the all the required components to create an account still exist. You can make such account by using net user command- let’s see how to do this.
Before you start the process, firstly you have to create a system restore point. Now, to create a Guest account in Windows 10, follow the below steps:
- In the ‘Start’ box, search for ‘Command Prompt’. Right click on the result and choose ‘Run as administrator’.
- Type in the following command and then hit the ‘Enter’ button.
net user ABC /add /active:yes
Here, ‘ABC’ is the name of user account, you can name it whatever you want. But remember, the name of the account should not be ‘Guest’ as it is reserved by Windows.
- Once you create the account, execute the following command. It allows you to add a password to the account. Since, it’s a guest account; you might not need to add a password to it. So, press ‘Enter’ to skip.
net user TWC *
- Now, you have to delete this newly created account from ‘Users’ group and include it to ‘Guests group’. Copy-paste the below commands and hit ‘’Enter’ after each of them.
net localgroup users TWC /delete
net localgroup guests TWC /add
- Now, you have successfully created the account at the Guest level.


