
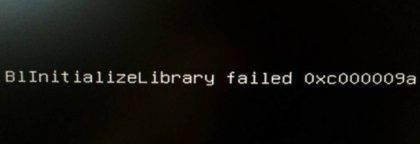
B1 INITIALIZE LIBRARY failed issue: Error Code 0xc000009a on Windows PCs
This article will help you to Fix Error 0xc000009a Windows PC with several recommended methods. If you are facing Error 0xc000009a B1 Initialize library failed issue on your Windows PCs, then you are in right place. We definitely trying out to reach your problem as well as we will provide straightforward steps and fresh procedures to solve the issue. Don’t be panics, please read this article carefully.
What is Error Code 0xc000009a on Windows PC?
“0xc000009a Error” is common Windows issue that is usually caused by incorrectly configured System’s settings or irregular entries in the Windows System elements. This error contains the details of malfunction including why it occurred, which system component or applications malfunctioned to cause this issue along with some other information.
Common reasons behind this problem include incorrect or failed installation or uninstallation of software that may have left invalid entries in your Windows System elements, malware or viruses attack, improper System shutdown due to power failure or another factor. Sometimes, this error occurs on your Windows device when some important System files deleted accidently.
Many Windows users have already reported about “Error 0xc000009a B1 Initialize library failed issue” on various online platform including Microsoft Official forum site and other popular platforms, and asked for the solution.
If you are using a cloned SSD/ HDD or overclocked frequencies, expect to see this error during startup sequence. If you are one of them who are facing the same, then you can read & follow our instructions given below to fix. Let’s go for the solution.
Reasons behind Error 0xc000009a:
- This error can occur due to B1 Initialize library failed issue.
- It might possible to get this error on your PCs when you are trying to install any application or updating it.
- You may receive Error 0xc000009a on your Windows PCs due to complexity of some System error problem.
- It might possible to get this error when incorrectly configured System or irregular entries in your Windows registry.
- You may face Error 0xc000009a after installing any Windows service pack on your PCs.
- It might possible that your System has malware or spyware related issue. No doubt, malware can do anything in your PC which can be malicious. It may cause Error 0xc000009a on your PCss
- When you start a lots of services and then trying to do hibernate. If your System has failed to hibernate, then it might possible your System has Error 0xc000009a Error 0xc000009a B1 Initialize library failed problem.
Ways to Fix Error 0xc000009a Windows PC
Procedure 1: Restart your Windows PC to resolve Error 0xc000009a
Step 1: Click on Start Menu
Step 2: Click on right side of Shutdown
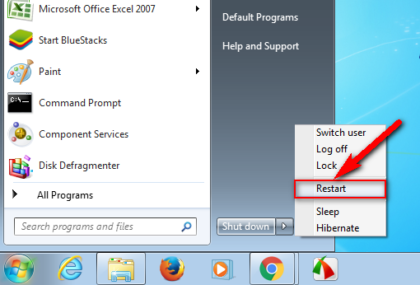
Step 3: Now, click on Restart option there to restart
Step 4: Once done, please check if the problem is resolved
Procedure 2: Run Disk Defragmentation or Backup Utilities on your Windows PC
Step 1: Click on Start menu and search or go for Disk Defragmenter
Step 2: Once open, chose disk which you want to defrag it
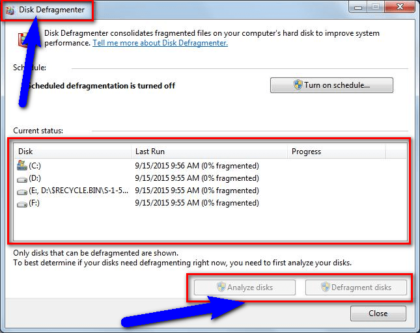
Step 3: Now, click on the Analyze disks or Defragment disks options
Step 4: Run the defragment process and wait to finish
Step 5: Finally, close the Window and check if the problem is resolved.
Procedure 3: Check for corrupted hard drive by “CHKDSK/F” command
Step 1: Press Window + X key from keyboard and select Command Prompt as Administrator
Step 2: Now, type or copy & paste the command CHKDSK/F in command prompt and press enter key
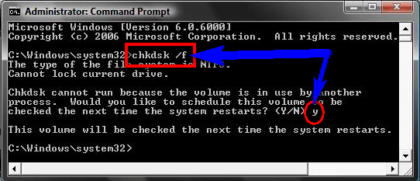
Step 3: Wait to complete the process. Please check if the issue is resolved.
Procedure 4: To resolve Error 0xc000009a, run “sfc/scannow” command in Command Prompt
Step 1: Press Window + X key from the keyboard and select Command Prompt as Administrator
Step 2: Now, type or copy & paste sfc/scannow command in command line and press enter key from keyboard
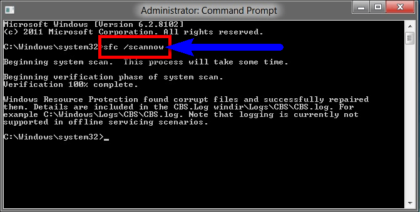
Step 3: it will take few seconds. Once complete, close all tab and check if the error is resolved.
Procedure 5: To fix Error 0xc000009a Windows PC, you can create System Restore point on your PC
Step 1: Click on Start button and search or go for System Restore
Step 2: Click on it and open it
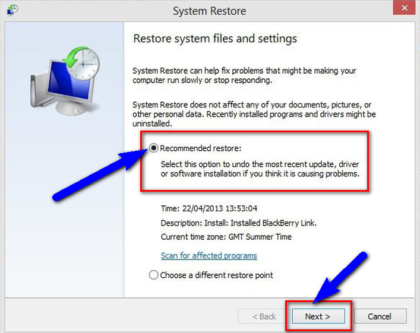
Step 3: Now, check the Recommended settings or Select a restore point
Step 4: After that, click on Next option and follow the Wizard
Step 5: Once the process finished, close the Window.
Procedure 6: “Troubleshoot” & Run an “Automatic Windows Repair” on your PC
Step 1: Click on Start button and search or go for PC settings
Step 2: Now, click on Troubleshoot options
Step 3: After that, click on Advance options
Step 4: click on Automatic Repair options
Step 5: Once the process of troubleshooting finished, close the Window and please check if the trouble is resolved.
Procedure 7: Run Full Registry Cleaner of your Windows PCs
Step 1: At first, you can download & install Ccleaner (PC optimization software) on your PCs from official its site.
Step 2: Once downloading & installing process finished, open the Ccleaner
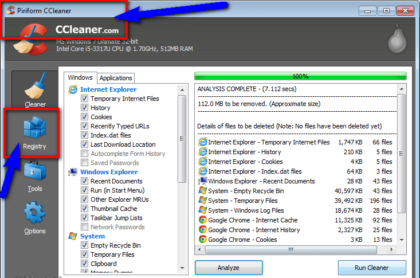
Step 3: Now, click on Registry option
Step 4: Click on their Scan for issues options
Step 5: After scanning, select Fix Selected Issues options to fix it
Step 6: Finally, restart your PC and check if the problem is resolved.
Procedure 8: Run a Full Scan of your Windows PC for Malware or virus
Step 1: Click on Start menu and search or go for Microsoft Security Essentials.
Step 2: Click on it and open it.

Step 3: Check the Full options to scan and click on Scan Now.
Step 4: After scanning, close the tab and check if the trouble is resolved
Procedure 9: Delete the files & Re-allocation your Game again
Step 1: Delete your arma3launcher.exe.config file
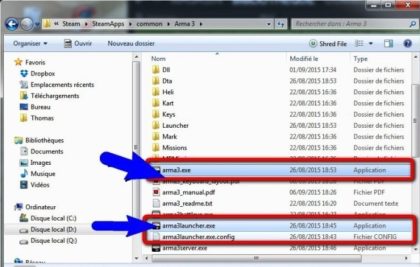
Step 2: Now, right click on Steam
Step 3: Click on the Local files options
Step 4: Reallocate your Game again
Step 5: Once the process finished, close the Window
Step 6: Finally, restart your computer and please check if the problem is resolved.
Procedure 10: Deactivate Hibernation and then reactivate it using Command Prompt
To delete hiberfil.sys file and deactivate Hibernation, follow the steps below:
Step 1: Press “Windows + X” keys together from keyboard and select “Command Prompt as Administrator”
Step 2: In the opened “Command Prompt” window, type “powercfg.exes/hibernate off” command and hit “Enter” key
To create a new Hiberfil.sys file and activate Hibernation, follow the steps below:
Step 1: Type “powercfg.exe/hibernate on” in “Command prompt” and hit “Enter” key to execute
Step 2: Wait to finish the process.
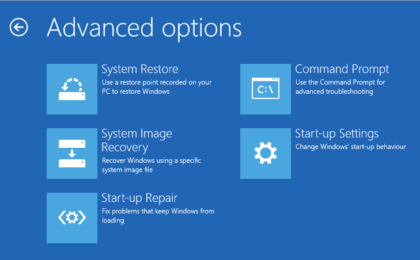
Procedure 11: Fixing the entire booting sequence using “Bootrec.exe utility”
“Bootrec.exe utility” is build-in Windows utility that is capable of fixing master boot record, the boot sequence and boot configuration data. To starts the procedure of repairing booting sequence, you need a valid Windows Installation Media for your Operating system.
Step 1: Insert Windows Installation Media and press any key from keyboard to boot from it
Step 2: At the initial Windows Installation window, click on “Repair your computer” at the bottom right or left corner of screen depending on your Windows version
Step 3: This will open “Advanced Options” window. Now, go to “Troubleshoot > Command Prompt”
Step 4: In the opened “Command Prompt” window, type the follow command one-by-one and hit “Enter” key after each to rebuild the entire Boot Configuration data.
“bootrec.exe”
“bootrec.exe /fixmbr”
“bootrec.exe /fixboot”
“bootrec.exe /scanos”
“bootrec.exe /rebuildbcd”
Step 5: Wait complete the process. Once done, restart your computer to save the changes and please check if the trouble is resolved.
Conclusion
I hope this article helped you to fix Error 0xc000009a Windows PC with several easy methods. You can choose either one or all the procedure to fix B1 Initialize library failed issue as per your System requirement. If you have any suggestions or queries regarding this, please write on comment box given below.
If you are unable to fix the issue with solution given in this article, then it might possible that your System has infected from malicious harmful viruses or your have installed malicious unwanted programs in your computer accidently. In that case, you can scan your PC with very powerful antimalware toolthat is able to delete all junk files or viruses from your System.
