
What is ‘USB Mouse and Keyboard stopped working’ issue in Windows 10?
If you are experiencing ‘USB Mouse and Keyboard stopped working’ issue when you trying to perform any actions on your Windows 10 computer using USB Mouse and Keyboard connected to it, then you are in right place for the solution. In this post, you will be guided with easy steps/methods to resolve the issue. Let’s starts the discussion.
‘USB Mouse and Keyboard not working’ issue: It is common problem associated with USB Mouse and Keyboard device attached to your Windows computer. This issue in Windows 10 computer indicates that Windows 10 failed to detect your USB Mouse and/or USB Keyboard for some reason that’s why you are experiencing issue with your mouse and keyboard in your computer. There could be several reasons behind this issue including USB mouse and keyboard hardware issue, corrupted or outdated driver of your USB mouse and keyboard device and other reasons.
In most cases, only one HCI devices like Mouse or keyboard might fail to work. In such case, you can try On-Screen keyboard – Windows 10 built-in utility offers keyboard functionality, if your USB keyboard is not working. To do so, you should make sure you have a wireless/PS2 mouse connected to your computer, and then right-click on taskbar and select ‘Show touch keyboard button’ option to open ‘On-Screen Keyboard’.
Some users reported that ‘USB Mouse and Keyboard stopped working’ issue often arises after recent Windows OS update. Corruption in Windows settings, files or registry could be another possible reason behind this issue. Also, missing, corrupted or outdated drivers for your USB mouse and keyboard device in Windows 10 computer can cause this type of problem. You can uninstall and then reinstall drivers for your USB keyboard and mouse, or install driver updates for your keyboard and mouse in computer in order to fix the issue. Let’s go for the solution.
How to fix USB Mouse and Keyboard stopped working in Windows 10?
If USB mouse and keyboard not working, then you can try connecting PS2 mouse/keyboard to computer, and perform these methods.
Method 1: Check PS2 mouse and keyboard
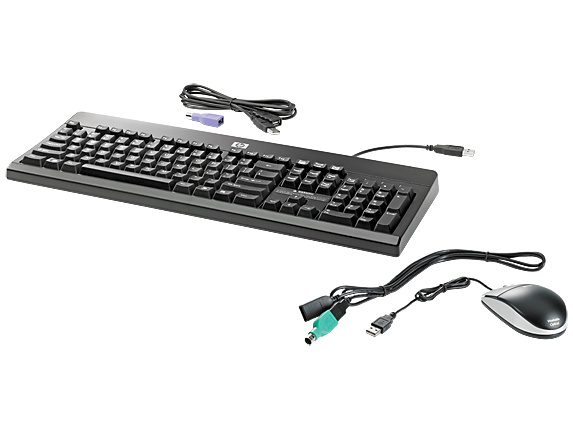
One possible way to fix the issue is to connect PS2 mouse and keyboard to your Windows 10 computer when your device is turned OFF, and then turn ON your device and switch PS2 mouse/keyboard to USB keyboard/mouse and check if it works. If you are not aware, PS2 port is 6-pin connector used for connecting keyboards/mouse to your computer.
To fix this issue, at first you need to turn OFF your Windows device and then plug your PS2 mouse/keyboard to PS2 ports of your computer. After that, turn ON your Windows device and try switching your USB keyboard/mouse and check if it works without any issue. If the issue is still persist, keep your USB keyboard/mouse connected and restart your computer, and check if it works.
Also, you can try to fix the issue by loading your Windows OS without any peripheral devices connected means remove all peripheral devices, and once operating system is fully loaded, plug in the peripheral devices and check if it works.
Method 2: Turn OFF ‘Fast Startup’ in Windows 10
Fast Startup or Fast Boot feature in Windows 10 works similarity to hybrid sleep modes of previous Windows OS versions. It combines the elements of cold shutdown and the hibernate feature. This feature makes Windows boot faster so you don’t have to wait traditional time. However, this feature can cause this type of issue by not loading the required drivers properly each time. In such case, you can try to fix the issue by disabling this feature in Windows 10.
Step 1: If USB mouse and keyboard not working, then you can try connecting PS2 mouse/keyboard to computer, and perform this method. Press ‘Windows + R’ keys on keyboard, type ‘Control Panel’ in the opened ‘Run’ dialog box and hit ‘Ok’ to open ‘Control Panel’
Step 2: In ‘Control Panel’, Select ‘Small Icons’ option from dropdown next to ‘View by’ section at top-right corner of control panel
Step 3: Find and click on ‘Power Options’. In ‘Power Options’ window, click on ‘Choose what power button do’ in left pane, and click on ‘Change settings that are currently unavailable’
Step 4: Now, deselect ‘Turn ON Fast Startup (not recommended)’ checkbox and then save the changes
Step 5: Restart your computer and check if USB Mouse and Keyboard not working issue is resolved.
Method 3: Reinstall or update USB keyboard/mouse driver in Windows 10
Problems with keyboard/mouse driver cause this type of issue in computer. You can uninstall and then reinstall driver for keyboard/mouse, or update keyboard/mouse driver in order to fix the issue.
Uninstall and then reinstall USB Keyboard/mouse driver in Windows 10:
Step 1: Press ‘Windows + X’ keys on keyboard and select ‘Device Manager’
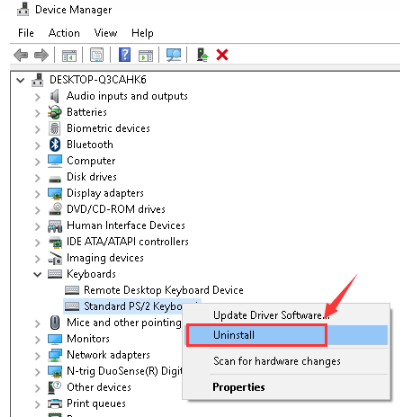
Step 2: In ‘Device Manager’, find and expand ‘Mice and other pointing devices’ or ‘Keyboards’ category
Step 3: Find and right-click on keyboard/mouse device, and select ‘Uninstall Device’. Follow on-screen instructions to finish uninstall and after that, restart your computer. This will automatically reinstall required drivers for connected mouse/keyboard. Once done, check if the error is resolved.
Update USB keyboard and mouse drivers in Windows 10:
If uninstalling and reinstalling keyboard/mouse driver didn’t work for you, then you can update the driver.
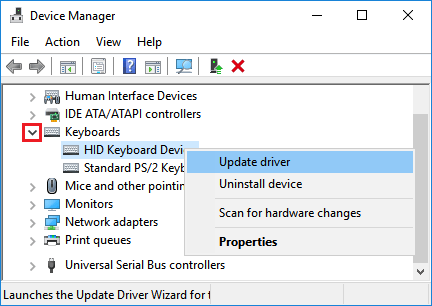
Step 1: Open ‘Device Manager’ and expand ‘Mice and other pointing devices’ or ‘Keyboards’ category
Step 2: Find and right-click on the device showing ‘Yellow Exclamation Mark’ on it, and select ‘Update Driver’. Follow on-screen instructions to finish update process. Make sure your device is connected to stable internet during update process.
Step 3: Once done, restart your computer to see the changes and check if your mouse/keyboard is working without any issue.
Download or reinstall Mouse/keyboard driver update in Windows 10 [Automatically]
You can also try to update your keyboard/mouse drivers to latest & correct driver version with ‘Automatic Driver Update Tool’. This software will automatically download and install the latest updates for all Windows drivers including keyboard and mouse connected to computer. You can get this tool through button/link below.
⇓ Get Automatic Driver Update Tool
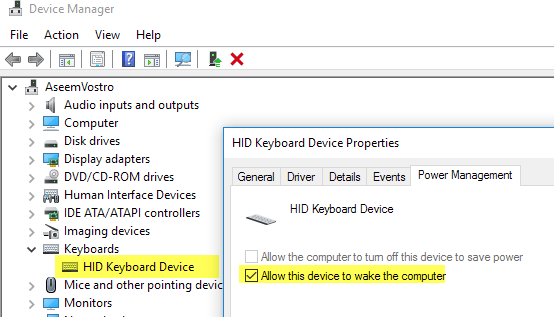
Method 4: Change Power Management Settings of your USB mouse/keyboard
Another possible way to fix the issue is to disable ‘Allow this device to wake the computer’ option in power management settings of your mouse/keyboard in your computer.
Step 1: Open ‘Device Manager’ and expand ‘Mice and other pointing devices’ or ‘Keyboards’ category
Step 2: Right-click on your keyboard/mouse and select ‘Properties’
Step 3: In ‘Properties’ window, click on ‘Power Management’ tab, and uncheck ‘Allow this device to wake the computer’ checkbox and save the changes. Repeat the same step for all mice and keyboards device showing in ‘Device Manager’
Step 4: After that, expand ‘Universal Serial Bus Controllers’ category inside ‘Device Manager’, right-click on ‘USB Root Hub’, and select ‘Properties’
Step 5: In ‘Properties’ window of ‘USB Root Hub’, click on ‘Power Management’ tab, deselect ‘All the computer to turn OFF this device to save power’ checkbox, and hit ‘Apply’ and ‘OK’ button to save the changes. Repeat the same step for all USB Root Hubs if you have more than one.
Step 6: After that, restart your computer and check if the problem is resolved.
Method 5: Disable ‘Ease of Access’ settings
Another possible way to fix the issue is to disable ‘Ease of Access’ settings in your Windows 10 computer.
Step 1: Type ‘Ease of Access’ in ‘Windows Search Box’ and open it from results appear
Step 2: In the opened ‘Ease of Access Center’, select ‘Make the mouse easier to use’ category and deselect ‘Turn ON Mouse keys’ to disable it, and then save the changes. Once done, restart your computer and check if USB mouse not working issue is resolved.
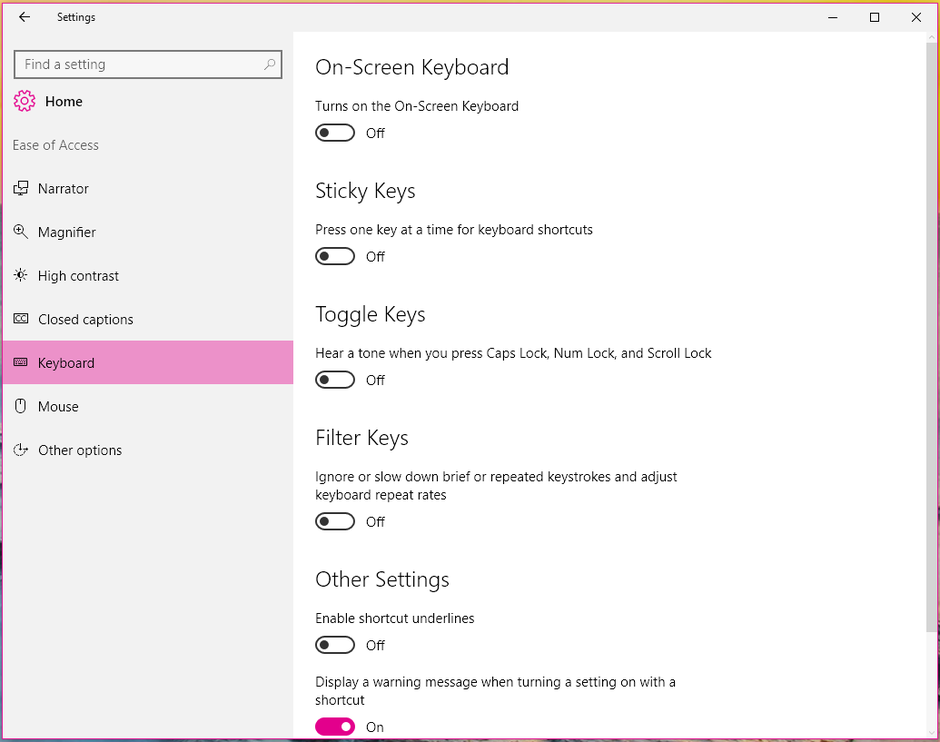
Step 3: If you are facing USB keyboard not working issue, then try this step. Open ‘Ease of Access Center’ using ‘step 1’ and select ‘Make the keyboard easier to use’, deselect the below checkboxes to disable them.
“Turn on Mouse keys”
“Turn on Sticky Keys”
“Turn on Toggle Keys”
“Turn on Filter Keys”
Step 4: Finally, save the changes and exit the ‘Ease of Access Center’. ‘Filter keys’ can also be disabled by pressing ‘Shift’ key for 10 seconds and then hit ‘Yes’ button on popup appears.
Step 5: Once done, restart your computer and check if the issue is resolved.
Method 6: Run CHKDSK scan, DISM Scan and SFC scan command in Windows 10
Sometimes, this issue can be occurred due to corrupted hard drives or sectors. You can fix the issue by running chkdsk command in Windows 10 computer.
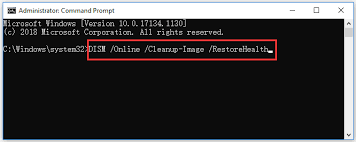
Step 1: Press ‘Windows + X’ keys on keyboard and select ‘Command Prompt as Administrator’
Step 2: In the opened ‘Command Prompt’, type ‘chkdsk E: /f’ command and hit ‘Enter’ key to execute. Here, ‘E’ is name of disk driver which is following by the ‘/F’ command.
Step 3: After that, type ‘sfc /scannow’ command and hit ‘Enter’ key to execute.
Step 4: Once executed, enter and execute the following command.
DISM /Online /Cleanup-Image /RestoreHealth
Step 5: Once executed, restart your computer and check if the issue is resolved.
Method 7: Change BIOS Settings
One possible way to fix the issue by making certain changes in BIOS settings in your computer.
Step 1: Restart your computer and when booting initiates, press ‘F2’, ‘Delete’ or other right keys combination to enter into BIOS mode. These key combinations may vary according to your PC’s motherboard.
Step 2: Once you are inside BIOS setting in computer, try disabling USB2 Legacy Support
Step 3: Once done, save the changes and exit BIOS, and restart your computer, and check if the issue is resolved.
Step 4: If the issue is still persist, you can perform BIOS setting reset to Optimized default in order ot fix the issue.
Method 8: Perform Windows Restore
If the ‘USB Mouse and Keyboard stopped working’ issue is still persist, then you can perform system restore operation in computer to fix the issue. You can restore your computer to restore point according to date & time when everything was working well.
Step 1: Press ‘Windows + R’ keys on keyboard, type ‘rstrui’ in the opened ‘Run’ dialog box and hit ‘Ok’ button to open ‘System Restore’
Step 2: In ‘System Restore’ window, click on ‘Next’, select a restore point according to date & time when everything was working well, and click on ‘Next > Finish’ to start restoring process
Step 3: Once done, restart your computer and check if the issue is resolved.
Fix USB Mouse and Keyboard not working issue with ‘PC Repair Tool’ [Recommended Solution]
‘PC Repair Tool’ is easy & quick way to find and fix BSOD errors, DLL errors, EXE errors, problems with programs/applications, malware or viruses issue, system files or registry issues, and other system issues with just few clicks. You can get this tool through button/link below.
⇓ Get PC Repair Tool
Conclusion
I am sure this post helped you on How to fix USB Mouse and Keyboard stopped working issue in Windows 10 with several easy steps/methods. You can read & follow our instructions to do so. That’s all. For any suggestions or queries, please write on comment box below.
