
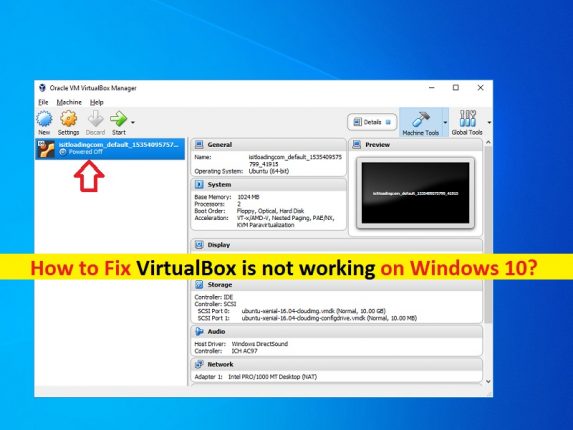
What is ‘VirtualBox is not working’ issue on Windows 10?
If you are facing ‘VirtualBox is not working on Windows 10’ issue while trying to open ‘VirtualBox’ in your Windows 10 computer, then you are in right place for the solution. Here, you will be guided with easy steps/methods to resolve the issue. Let’s starts the discussion.
‘VirtualBox’: VirtualBox or Oracle VM Virualbox is free and open-source hosted Hypervisor for x86 virtualization designed & developed by Oracle. This tool can be installed on Microsoft Windows OS, MacOS, Linux, Solaries and OpenSolaries. VirtualBox supports the creation and management of guest virtual machines running Windows, Linux, BSD, OS/2, Solaries, Haiku, and OSx86, as well as limited virtualization of MacOS guests on Apple hardware.
This tool can be used to install another Windows OS in the virtual machine means you can use another operating system on the top of your current operating system using VirtualBox software. However, several users reported that they faced ‘VirtualBox is not working on Windows 10’ while they tried to open VirtualBox or Oracle VM VirtualBox Manager in their Windows 10 computer. This indicates that you can’t make any virtual machine and get it to run.
The possible reason behind ‘VirtualBox is not working/opening’ issue can be disabled some modules like ‘Hyper-V’ in your computer. These modules might be disabled after a recent windows update that’s why you are facing the issue. Also, this issue can be occurred due to conflict between VirtualBox’s drivers and Windows drivers.
Another possible reason behind this issue can be constant updates of Windows 10 OS that can cause issue with software displaying the virtual machine in your computer. Also, this issue can be occurred due to problematic VirtualBox software itself. You can update VirtualBox to latest version in order to fix the issue. Let’s go for the solution.
How to fix VirtualBox is not working on Windows 10?
Method 1: Fix ‘VirtualBox is not working/opening’ issue with ‘PC Repair Tool’
‘PC Repair Tool’ is easy & quick way to find and fix BSOD errors, DLL errors, EXE errors, problems with programs/applications, malware or viruses issues, system files or registry issues, and other system issues with just few clicks. You can get this tool through button/link below.
⇓ Get PC Repair Tool
Method 2: Update VirtualBox to latest build
One possible way to fix this issue is to update VirtualBox to latest available build. It might possible there is some with older or current version of VirtualBox in your computer like compatibility issues and other issues. So, you can update it in order to fix the issue.

Step 1: Open your browser and visit ‘VirtualBox Official site’ or visit ‘https://www.virtualbox.org/’ page.
Step 2: Download the latest version of VirtualBox for Windows in your computer
Step 3: Now, before installing latest version of Virtualbox, uninstall the older or existing one. To do so, open ‘Control Panel’ in Windows 10 and go to ‘Uninstall a Program > Programs & Features’
Step 4: Find and select ‘VirtualBox’ in the list of programs, and select ‘Uninstall’. Follow on-screen instructions to finish uninstall.
Step 5: Once done, find and double-click on ‘Downloaded Latest version of VirtualBox setup file’ follow on-screen instructions to finish installation. If you already had existing VM’s in the older VirtualBox folder, then you can try locating your newly installed VM to your folder. The path of virtualBox is:
C:\Users\[username]\VirtualBox VMs
C:\Users\[username]\VirtualBox VMs\[vm group]\[vm name]
Method 3: Enable ‘Hyper-V’ in ‘Windows Features’
As mentioned, disabled ‘Hyper-V’ module in your computer can cause ‘VirtualBox is not working/opening’ issue. Check if this module is enabled or not, and if not, enable the service in order to fix the issue.
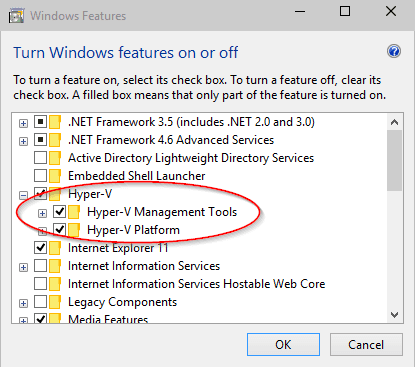
Step 1: Type ‘Turn Windows Features ON or OFF’ in ‘Windows Search Box’ and open it from results appear
Step 2: In ‘Windows Features’ window, find and tick the ‘Hyper-V’ checkbox if it is not checked.
Step 3: Finally, hit ‘Ok’ to save the changes and restart your computer. After restart, try making new virtual machine using VirtualBox and check if it works.
Method 4: Disable ‘Driver Enforcement’
‘Driver Enforcement’ is safety feature in Windows which doesn’t let any suspicious or badly written drivers being installed in your computer. However, VirtualBox installs its own drivers for virtual machine in virtual environment that can cause conflict with the settings. You can disable ‘Driver Enforcement’ in computer in order to fix the issue.
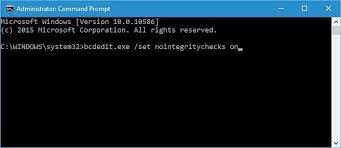
Step 1: Press ‘Windows + X’ keys on keyboard and select ‘Command Prompt as Administrator’
Step 2: Type the following command and hit ‘Enter’ key to execute
bcdedit.exe /set nointegritychecks on
Step 3: This command will disable the integrity checks and let you install any driver. Once done, restart your computer and check if it works
Step 4: If you want to enable ‘Integrity checks’ again, enter the following command in Command Prompt
bcdedit.exe /set nointegritychecks off
Method 5: Install VirtualBox Adapters manually
Sometimes, this issue can occur if VirtualBox fails to install Network Adapters properly on your computer. In such case, you can fix the issue by installing the Virtualbox Network drivers and then setting the configuration properly.
Step 1: At first, delete all previous VirtualBox Adapters.
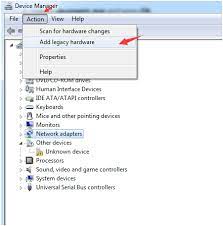
Step 2: Now, press ‘Windows + X’ keys on keyboard and select ‘Device Manager’
Step 3: In ‘Device Manger’, click on ‘Action > Add Legacy Hardware’. Now, install Oracle VirtualBox Adapters manually by navigating the following path
C:\Program Files\Oracle\VirtualBox\drivers\network\netadp\VBoxNetAdp.inf
Step 4: Once installed, you need to configure the settings. Open ‘Oracle VirtualBox’, click on ‘File > Preferences > Network > Host-only Network’ and click ‘Edit’
Step 5: Now, set the following information correctly in respective fields
IPv4 192.168.56.1
Mask 255.255.255.0
Step 6: Now, click on ‘DHCK Server’ tab and set the following in correct manner
Server address: 192.168.56.100
Server mask: 255.255.255.0
Low address bound: 192.168.56.101
Upper address bound: 192.168.56.254
Step 7: Finally, hit ‘OK’ to save the changes and restart your computer. After restart, try opening VirtualBox and check if it works.
Method 6: Change ParaVirtualization
ParaVirualization is software technique that allows the virtual machine to have a software interface. However, this feature can cause ‘VirtualBox is not working on Windows 10’ issue for some reasons. In such case, you can try to fix the issue by changing its option to ‘KVM’.
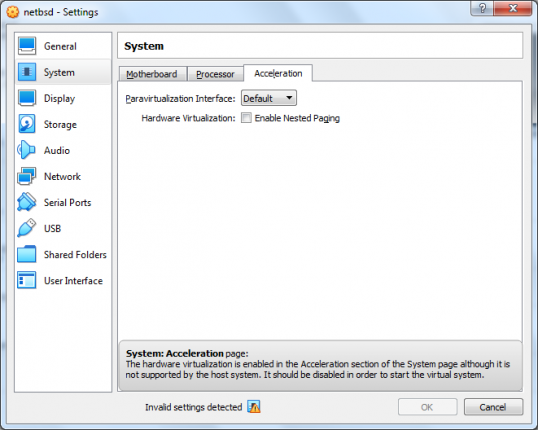
Step 1: Open ‘VirtualBox’ and go to ‘Settings > System > Acceleration > ParaVirtualization Interface’
Step 2: Select ‘KVM’ option from ‘ParaVirtualization Interface’ dropdown and hit ‘OK’ to save the changes
Step 3: After that, restart your computer and try launching virtual machine again and check if the error is resolved.
Method 7: Update graphics card drivers
One possible way to fix this issue is to update your graphics card driver in computer.
Step 1: Open ‘Device Manager’ and expand ‘Display Adapters’ category
Step 2: Right-click on your graphics card and select ‘Update Driver’. Follow on-screen instructions to finish update process.
Step 3: You can also download and install latest version of graphics card driver from manufacturer official site.
Step 4: Once done, restart your computer and check if the issue is resolved.
Download or reinstall Graphics Card driver in Windows 10 [Automatically]
You can also try to update your graphics card driver with ‘Automatic Driver Update Tool’. This software offers you to find and install the latest Windows drivers including graphics card driver. You can get this tool through button/link below.
⇓ Get Automatic Driver Update Tool⇓
Other Methods:
Step 1: Run VirtualBox application in compatibility Mode with Administrator permission
Step 2: Uninstall other conflicting VMwares
Step 3: Disable 3D graphics
Conclusion
I am sure this post helped you on How to fix VirtualBox is not working on Windows 10 with several easy steps/methods. You can read & follow our instructions to do so. That’s all. For any suggestions or queries, please write on comment box below.
