
Windows Explorer is the default file manager in Windows. The explorer.exe process is responsible for generating part of the user interface-Start Menu, Desktop icons and more.
But sometimes this built-in file manager fails to work as intended as so many users have claimed Windows Explorer restarts when opening folder. If you are too facing the same you have landed at the right place.
And if we talk about the potential reasons that cause the above mention issue then there are several reasons that are responsible for the above mention issue. We have enlisted some of the major culprits you can check:
#. Malware or Virus infection
#. Corrupted System files
#. Outdated Windows Operating System
#. Faulty Software
#. Auto play Errors
#. Permission Issues
#. Third-party incompatible programs
Table of Contents
Try these fixes for Windows Explorer restarts when opening folder
Method 1: Update your Windows
You are likely to face the above mention issue if you are using an outdated Windows OS and to do the same follow the below mention guidelines:
Step 1: Press Windows + I Keys to open the Settings bar> Now select the “Update & Security” feature
Step 2: Look at the left panel for “Windows Update” and then press on “Check for Updates” option under the panel located at the right.
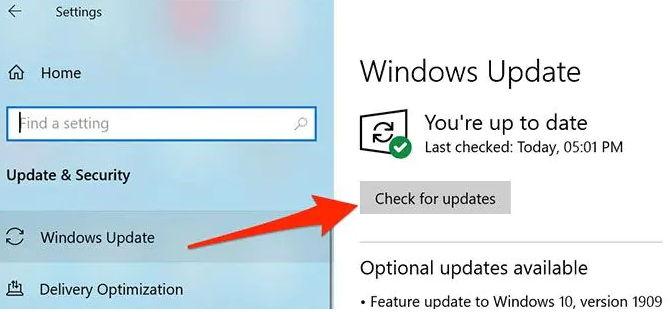
Step 3: If updates are present on the screen you can download them> once done then restart your PC
Method 2: Clear Windows Explorer History
We also suggest you to clear Windows Explorer History and to do the same follow the below mention guidelines:
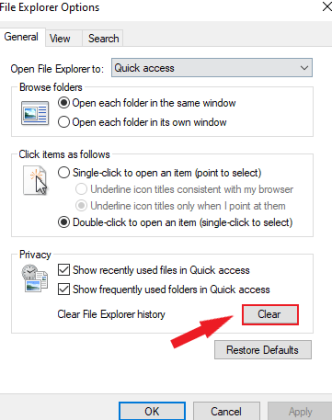
Step 1: Open the Start Menu and then type “File Explorer Options”
Step 2: Tap on “File Explorer Options” and go to the General tab
Step 3: Now locate the Privacy section and tap “Clear” button
Method 3: Scan your PC for Malware
If your Windows is infected with malware the chances are high that you will face the above mention issue. So it is recommended to scan your PC by following the below mention steps:
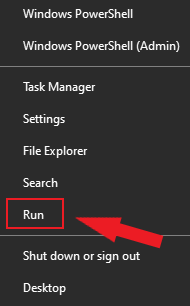
Step 1: Right-click Start Menu and select Run
Step 2: Then type in Windowsdefender and press OK > In the Windows Security Windows press Virus & threat Protection and press Scan options
Step 3: Select Microsoft Defender Offline scan and press Scan Now
Once the process gets completed Windows will reboot and start the scan for malware on your PC.
Method 4: Run SFC Scan
As we have earlier discussed you are likely to face the above mention issue because of corrupted system files. So in order to repair those corrupted files, you need to run SFC Scan and to do the same follow the below mention guidelines:
Step 1: Right-click on the Start Menu and click Windows PowerShell (Admin) > Once the PowerShell Windows opens up type sfc/scannow and press Enter
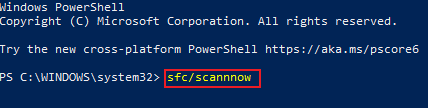
Once the scan gets complied it will repair and replace the files and then you can check if the issue resolved or not.
Method 5: Check Windows Error Logs
Checking the Windows Error logs is also a good option to resolve the above mention issue and to do the same follow the below mention guidelines:
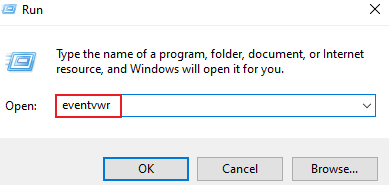
Step 1: First right-click Start Menu and select Run> Under the Run box type eventvwr and press OK > It will launch the event viewer.
Step 2: In the “Event View” tap on “Windows Logs” >”Application” in the left hand menu
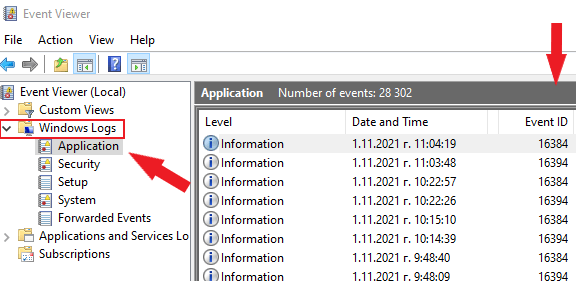
Step 3: Under the Application panel on the right, search for Event IDs with the value 1000. Event ID 1000 usually points to an error with Windows Explorer process
Step 4: If you found such errors, select it and check the General tab information.
Method 6: Launch Folder Windows in a Separate Process
Here in this method we suggest you to launch folder Windows in a Separate process and to proceed follow the below mention steps:
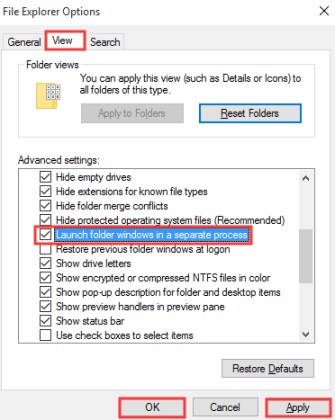
Step 1: First of all open File Explorer Options and navigate to the View tab> Check Launch folder Windows in a separate process and then click Apply and OK to save changes
Method 7: Check Account Permission
We also suggest you to check the Account Permission and to so the same follow the below mention guidelines:
Step 1: Open File Explorer, then right-click the folder you want to make changes in order to choose Properties
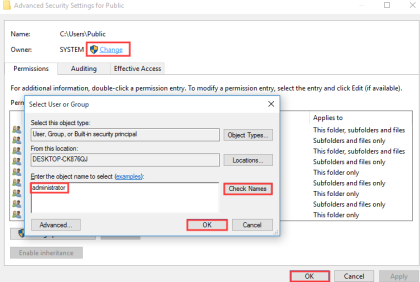
Step 2: Navigate to the Security tab and then choose Advanced> Now click Change next to Owner and then input administrator (your user account) in the box under the Enter the object name to select section. Then click Check Names to ensure that the name is right. Now click OK to exit Select User or Group and then tap on OK to save the changes.
Step 3: Under the User Properties Window, navigate to the Security tab and then click Edit… in order to change the permissions.
Step 4: In the Permission for Administrators section, check Allow for Full Control and then click OK to save the changes
Once you get the full permission to access the folder, see if the issue resolved or not
Method 8: Turn Off Quick Access and Set Open File Explorer to This PC
Several users have claimed that disabling the quick access is also a good option to resolve the Windows Explorer restarts when opening folder issue. To proceed follow the below mention guidelines:
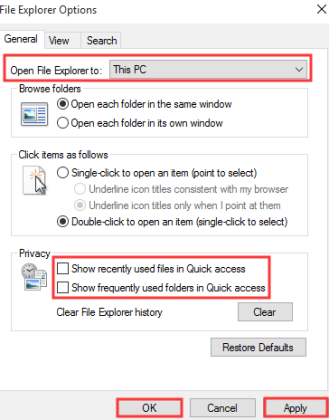
Step 1: First of all open the File Explorer Options and the navigate to the General tab> Set Open File Explorer to This PC instead of Quick Access
Step 2: Now uncheck both Show recently used files in Quick access and Show frequently used folders in Quick Access under Privacy section. Click Apply and OK to save the changes
Method 9: Disable Autoplay
Disabling Autoplay is also a good pick to resolve the issue and to do the same follow the below mention steps:
Step 1: Open Windows search and type Control Panel > select Control Panel app from the app results
Step 2: On the Control panel search box, you need to input Autoplay
Step 3: Then in the Autoplay, uncheck the “Use Autoplay for all media and devices” option
Step 4: After that click on Save to effect the changes and then restart your PC.
Method 10: Make some changes to Graphics cad Driver
Updating the Graphics cad Driver may also resolve your issue and t proceed you can follow the below mention guidelines:
Step 1: Use Win + X keys to choose Device Manager> then expand Display Adapters in the newly pop-out window then right-click your graphics card to choose Uninstall device
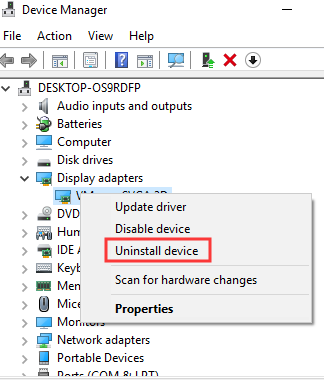
Step 2: Now check Delete the driver software for this device and then click Uninstall
Step 3: Now Reboot your PC and the system will automatically reinstall your graphics card> If Windows doesn’t reinstall your graphics card, then you should visit your graphics card manufacturer’s website to download the latest driver for your device
Step 4: Then open Device Manager again, click Action on the top to choose Scan for hardware changes
Once the process gets completed restart your PC.
Method 11: Run Netsh Winsock Reset
If none of the above mentioned methods works for you then it is recommended to run Netsh Winsock Reset. To do the same follow the below mention steps:
Step 1: First of all open the Command Prompt as Administrator> then type in Netsh Winsock Reset in Windows and press Enter key
Step 2: Finally Restart your PC and see if the issue resolved or not
That’s all about Windows Explorer restarts when opening folder, we assume you liked the blog. Thanks for Reading.
