
Windows 11 is now here and Microsoft has already started rolling it to the eligible PCs and laptops from earlier this month. As per the reported benchmarks result, the newly launched Windows 11 has a little impact on the gaming performance. The reason behind this impact is said to be the Microsoft’s implementation of Virtualization Based Security (VBS). So, if you are also the one facing Windows 11 impact on the gaming performance then you might want to disable the VBS. There could be multiple ways to disable the VBS in Windows 11 and all of them has been broadly discussed in this article.
Before going to the disabling process, it is important to check the current status of your Windows 11 PC’s VBS. So, that steps has also been discussed along with the pros and cons of disabling the Virtualization based security so that you can make your decision easily. So, let’s get started.
A Brief Information about Virtualization Based Security (VBS) in Windows 11
The Virtualization Based Security (VBS) is offered in Windows 11 and Windows 10 in order to create an isolated memory space for security features. It creates a virtual secure mode that is separate from the rest of the operating system and is created using Windows hypervisor. According to Microsoft, VBS provides protection from malware and virus attacks. VBS enables the security feature such as memory integrity or Hypervisor-protected code integrity (HVCI). It stops all the unsigned drivers and system files from running by thoroughly checking all the kernel mode drivers and binaries.
VBS feature is available for Windows 10 for many years but its enforcement in the new Windows 11 is a bit different. Earlier, enabling VBS in Windows 10 was optional and later in the late 2019, the Windows 10 started to come with enabled VBS by default. With Windows 11, the OEM’s enables the VBS by default and if you buy a new Windows 11 based PC, the VBS will be enabled out of the box.
Here, you may be wondering that why to disable a useful security feature (VBS) that is already enabled in Windows 11 by default. Well, the answer is not that straight. According the many independent test notably done by “PC Gamers” and “Tom’s Hardware”, the Windows 11 performance decreases when the VBS is enabled especially while playing games. You are most likely to face FPS drop issue in game on Windows 11 and hence disabling the VBS can boost the gaming performance.
In simple, I would like to explain the pros and cons of disabling the VBS on Windows 11
Pros:
The instant benefit that you may notice is the boost in gaming performance. You can play high end graphics games without any lags or frame drops.
Cons:
By disabling the Virtual Based Security (VBS, the overall PC security may get compromised. This could break the Hyper-V related features
How to Check the Virtualization-Based Security (VBS) status in Windows 11
For checking the status of VBS in your Windows 11 PC, follow the steps mentioned below.
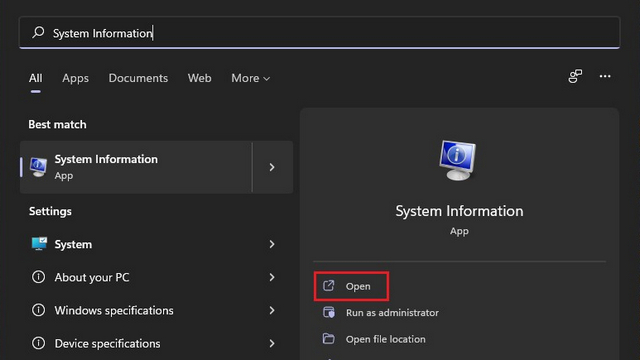
- Open the Windows 11 Startup menu. Go to Search box and type “System Information” or “msinfo32” and then press “Open”.
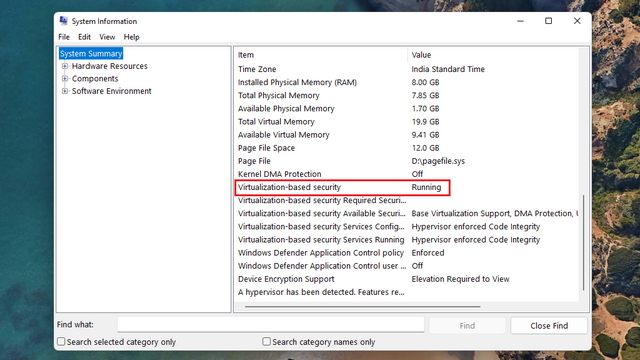
- In the “System Summary” section, look for “Virtualization based security” and if it shows as it is “Running” that means that “Virtualization Based Security (VBS)” is running in the work-station. Vise-versa, if it is shown “Not Enabled” then VBS is disabled.
Disable the Virtualization-Based Security (VBS) from settings
Method 1: Through Settings
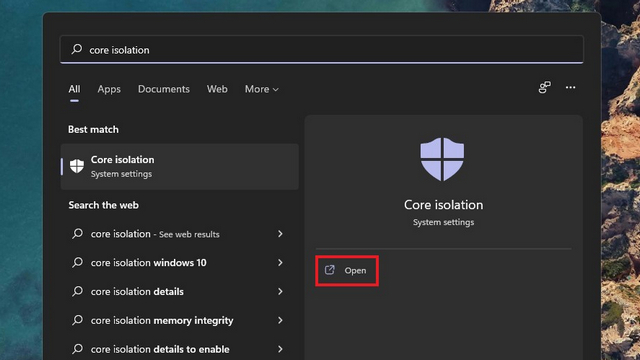
Open the Windows search by pressing on “Win” key. Type “Core isolation” and click ‘open’.
Here if you see that the “Memory integrity” toggle is enabled then you have to disable it in order to disable the VBS on Windows 11.
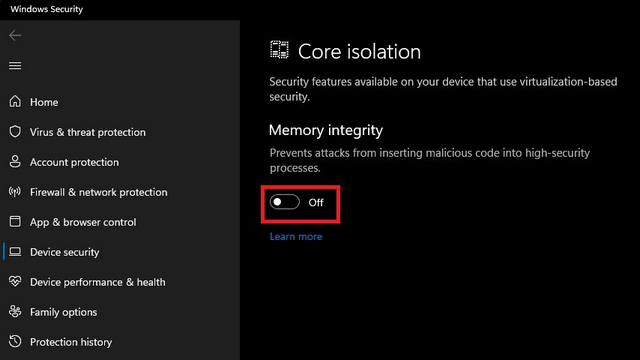
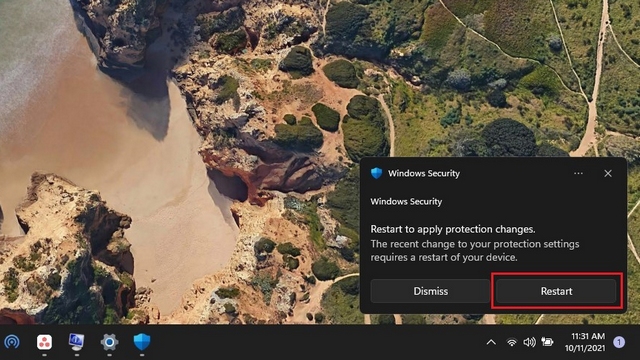
You will notice a pop-up asking you to restart the work-station. You can directly restart from the pop-up.
Method 2: By Removing Windows Component
In order to disable the VBS feature, you can disable the component that is responsible for the feature. You have to disable the Microsoft Defender Application Guard, Virtual Machine Platform, and Windows Hypervisor Platform. The Steps goes as:
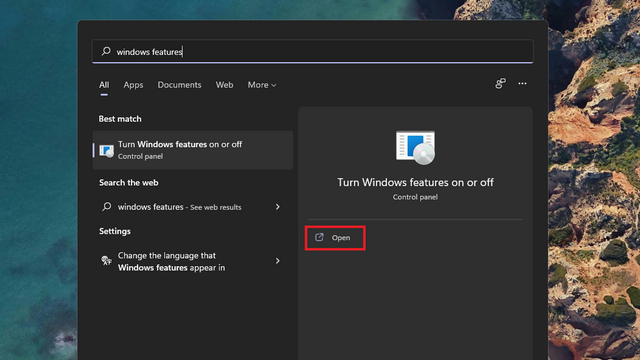
- Search for “Windows Feature” on pressing the Windows Key and then select ‘Open’.
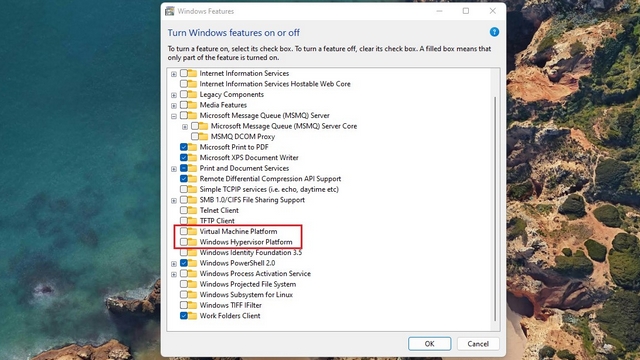
- Here you have to uncheck Virtual Machine Platform, Microsoft Application Defender Guard and Windows Hypervisor Platform. Click, on “OK” to save the changes you made.
Method 3: From Registry Editor
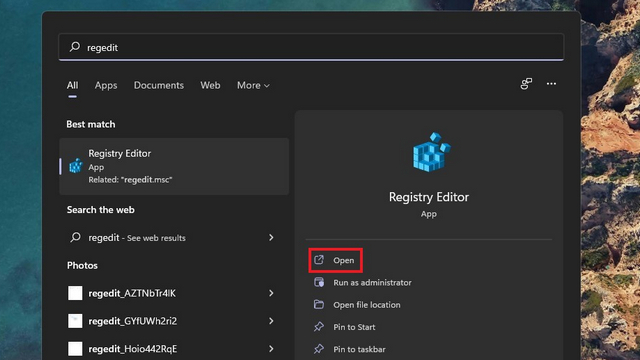
- You can also disable the virtualization based security (VBS) through Registry Editor. Use regedit command to open the registry editor.
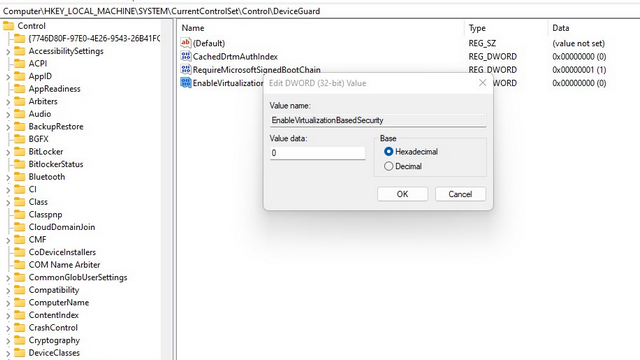
- In the registry editor, navigate the path : HKEY_LOCAL_MACHINE\SYSTEM\CurrentControlSet\Control\DeviceGuard and then double click on ‘EnableVirtualizationBasedSecurity’ on the right pane.
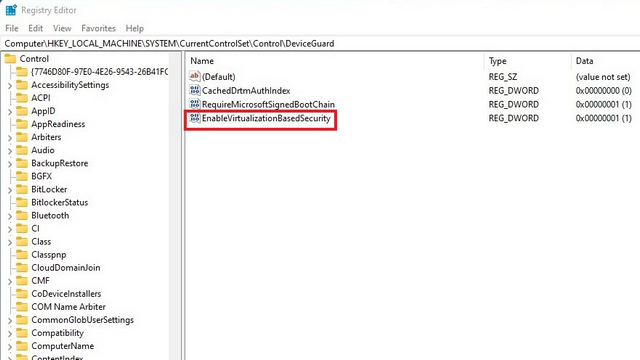
- In the Enable VirtualizationBasedSecurity pop-up, put the value data to ‘0’ and restart the work-station.
Method 4: Through Group Policy Editor
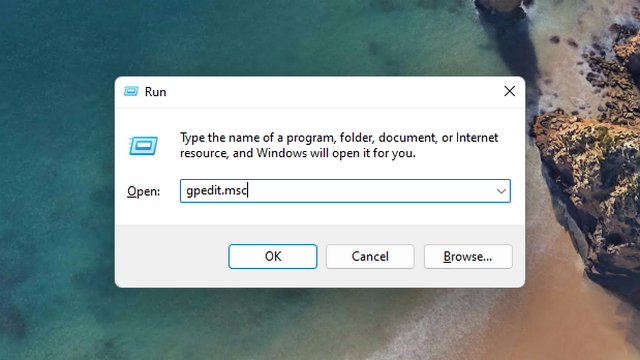
- Use ‘Win + R’ to open ‘Run’ window and type ‘gpedit.mse’ and then click on “OK”.
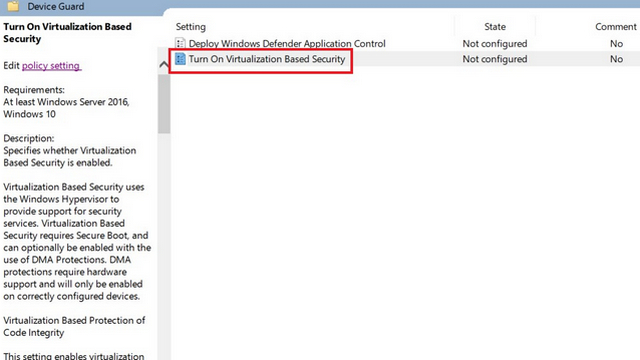
- In the Group Policy Editor, navigate the path, ‘Local Computer Policy\Computer Configuration\Administrative Templates\System\Device Guard’.
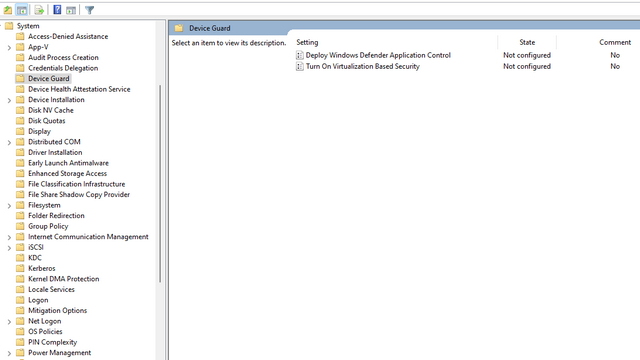
- In the right panel, double click “Turn on Virtualization Based Security”
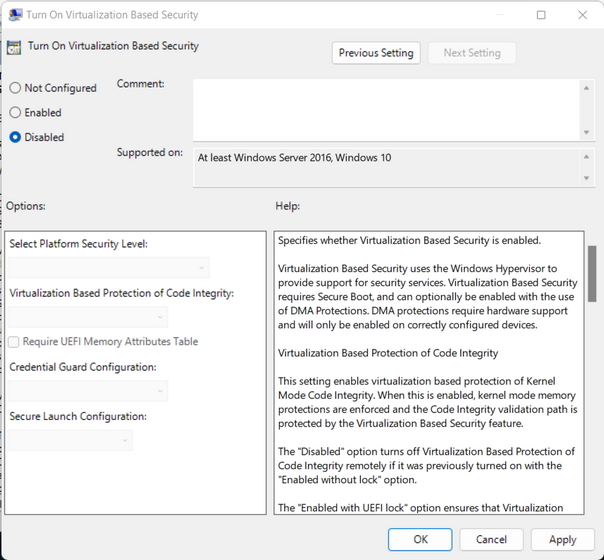
- In the newly opened dialog box, choose “Disabled option” and then click on ‘OK’
Disable Virtualization Based Security in Windows 11 to boost Gaming Performance
The detailed guide to turn-off Virtualization Based Security in Windows 11 comes to an end. However it is up to disable it or not. Considering the security feature of VBS and HVCI, it is better that you disable this feature unless you really need it. Most of the Windows 11 users are not gaming enthusiast or gamer or game streamer hence this disabling VBS in Windows 11 is definitely not a good idea for those.
