
Remote Assistance is a Windows built-in feature that allows one to get assistance offer technical help from a distance. The one sitting in front of the host PC can see what’s happening on her or his PC. But the users may meet with all kinds of issues when using the feature such as The Computer is not Setup to Send Invitation Remote Assistance. If you are too struggling with the same then you have reached at the right place. So without any further delay let’s get started with the discussion.
The user needs to understand that before using remote assistance they need to allow it first on their PC otherwise it will display a message saying “this computer is not set to send invitations” and will ask you t repair. So order to prevent this message it is better to set up remote assistance to avoid the message.
To proceed follow the below mention guidelines:
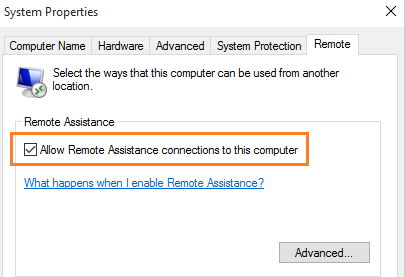
Step 1: Navigate to the Control Panel and search remote under the search box> click on Allow Remote access to your computer
Step 2: Now check the boxes where it’s written Allow remote Assistance to your Computer
Once you have allowed Remote Assistance on your PC then you can try to send invite in Windows Remote Assistance Program on Windows 10.
Here’s how:
Step 1: On your keyboard, press Windows key + R keys in order to open the Run> then write msra in it and press Enter key
Step 2: After that click on the first option which says, invite someone you trust to help you
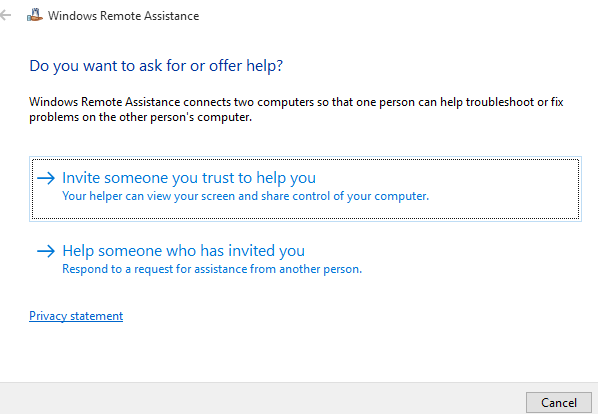
Step 3: Now there are two options visible namely:
#. Save this invitation as a file
#. Use Easy Connect
Steps for using file method:
Step 1: Tap on save this invitation as a file > Now save this file anywhere on your system
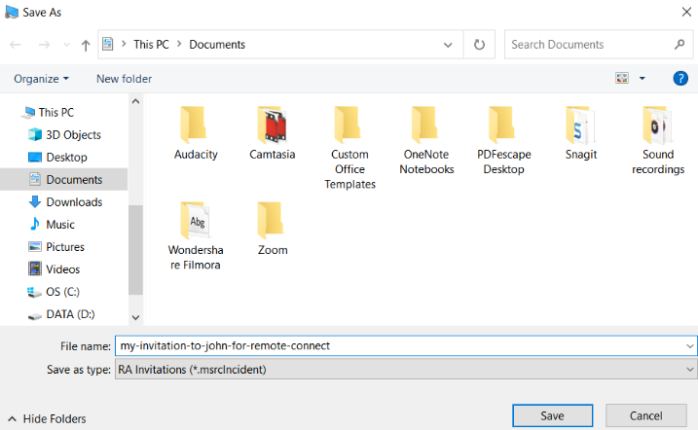
Step 2: Now send this file as an attachment over email or by any other means to your friend. When he will check it he will proceed further in his Windows 10 to connect to your PC.
Steps for using easy connect method:
Step 1: First of all click on Easy Connect Option
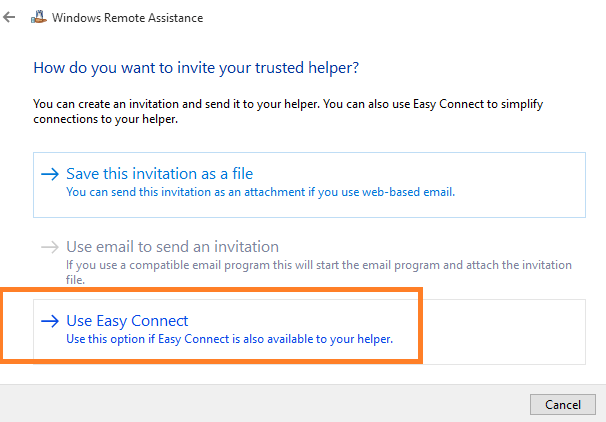
Step 2: Now next Window will show you password which you can give to your partner to connect to your PC.
Ask your partner to choose easy connect option while choosing to help someone while using remote assistance program.
Table of Contents
FAQs
How to fix allow remote assistance connections to this computer greyed out?
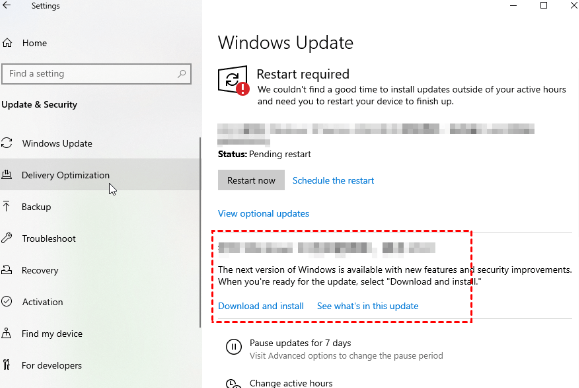
Method 1: Update to the latest version
In this method we suggest you to update your PC to the latest version. To do so follow the below mention guidelines:
Step 1: First of all tap on the Start Menu, and then click on Settings > find Update & Security
Step 2: Then download and install the latest version
Method 2: Configure GPO in Group Policy
In this method we suggest you to enable the “Configure Offer Remote Assistance” in Group Policy and to do the same follow the below mention guidelines:
Step 1: On your keyboard press Windows + R keys and then input “gpedit.msc” to open Group Policy.
Step 2: Go to Policies > Administrative Templates > System > Remote Assistance > Configure Offer Remote Assistance
Step 3: Then double click on Configure Offer Remote Assistance and then click on “Enabled” and then tap on OK
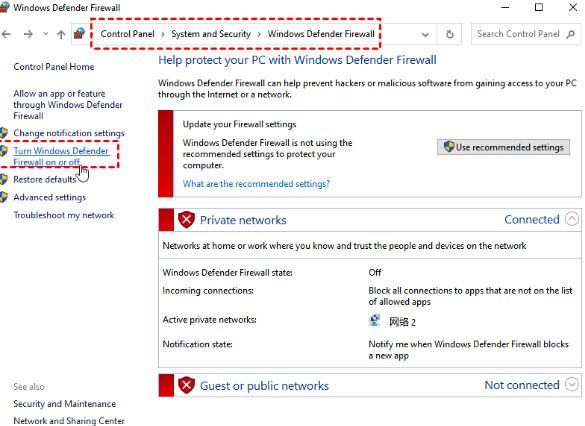
Method 3: Turn Off Windows Defender Firewall
Several users have claimed that disabling the Windows Defender Firewall can resolve the issue. To proceed follow the below mention guidelines:
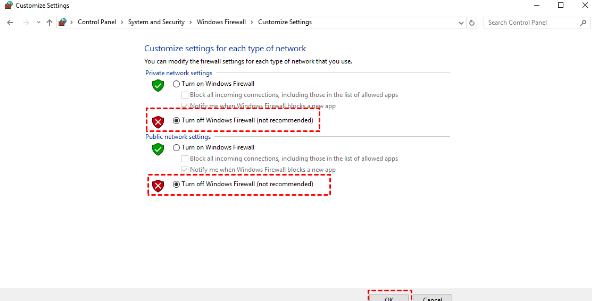
Step 1: Search Windows Firewall under the search box and then open it> tap on “Turn Windows Defender Firewall On or Off.
Step 2: Then tick “Turn Off Windows Firewall” in the Private and Public Networking Settings respectively
That’s all about The Computer is not Setup to Send Invitation Remote Assistance, we really hope you liked the blog and it was helpful for you.
